My $100 Fireplace Makeover with Behr Paint
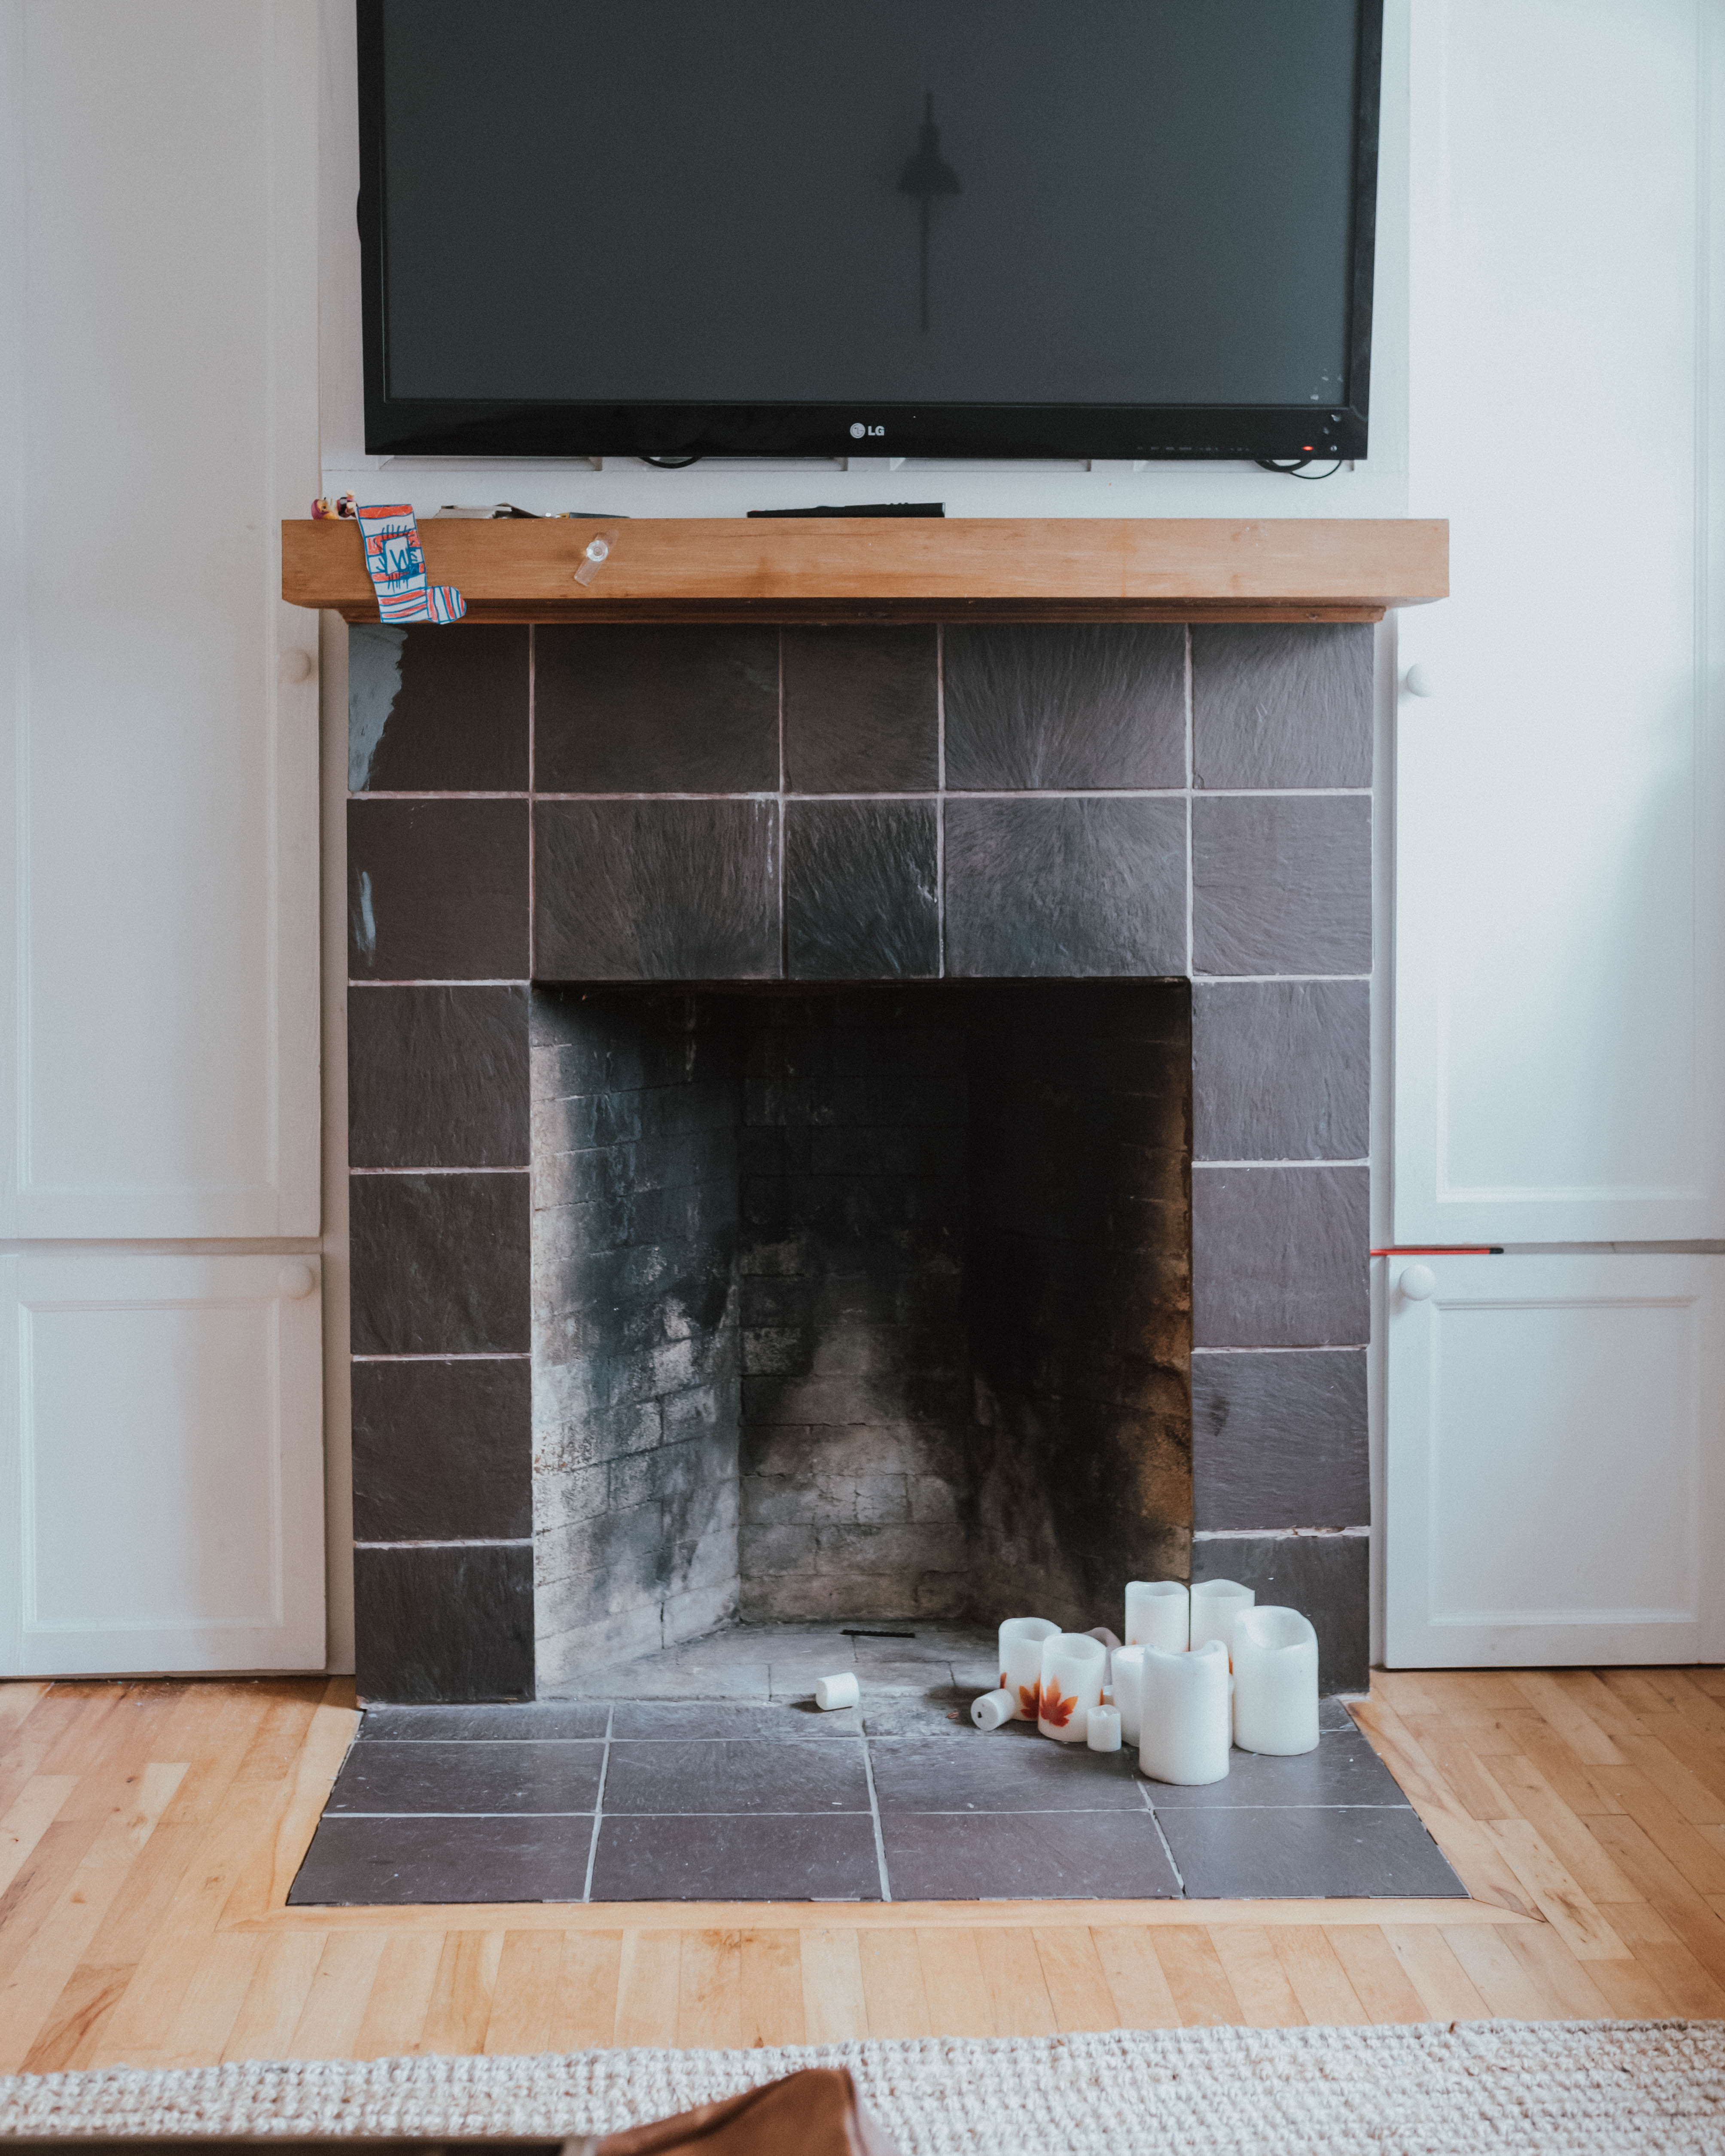
 It’s been 464 days since we moved in. That’s 464 days of looking at a fireplace that we didn’t love. Before we renovated the back family room into two rooms to make way for our laundry room, the dirty sad looking fireplace was awkwardly off to the side, usually surrounded by toys that are stored in the built-ins on either side, and always a bit of a random fixture instead of the heart of the space. So we needed a Fireplace Makeover.
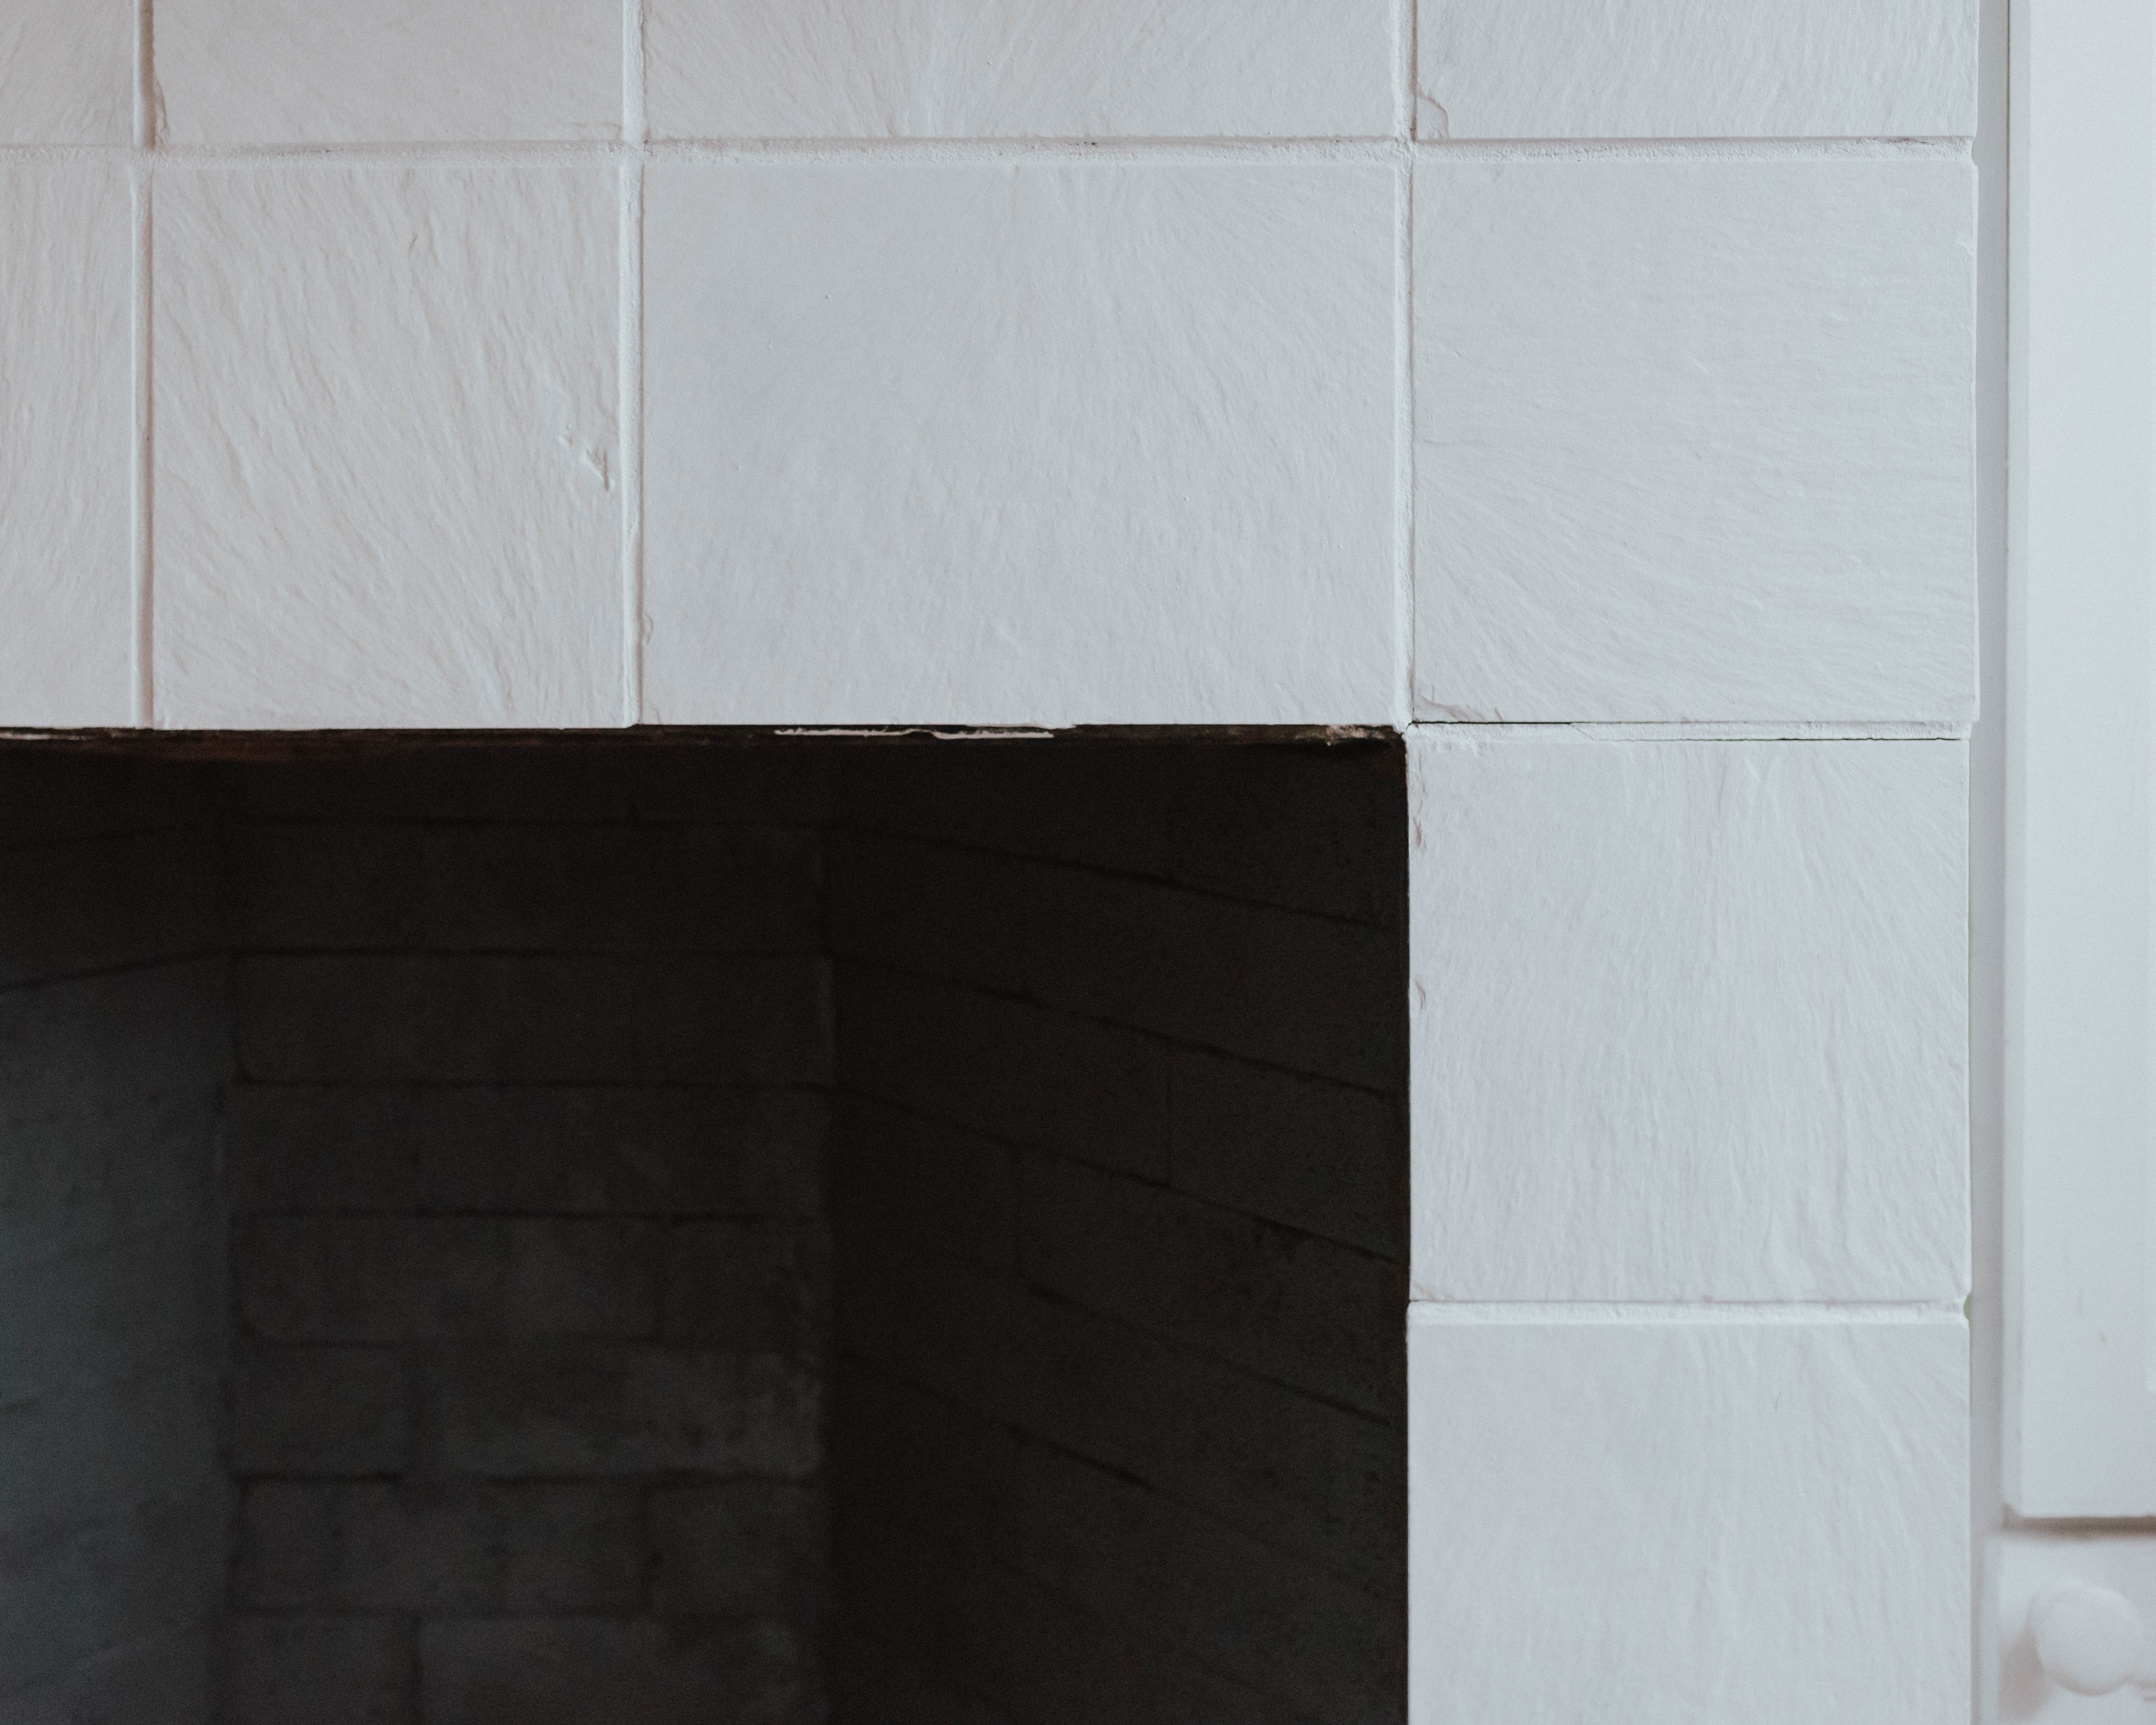
It’s actually an awkward fireplace—no flue to close it and super shallow. It is still usable but because it is such a shallow depth, we are actually too afraid to use it. So there it has sat for 464 days, with the thought that one day we will do something to it.
But then the wall was built and the laundry room was created and our fireplace that was awkwardly to the side of the room became the focal point with our television, (the only one in the house, besides our bedroom) above it. Every night I sat staring at the fireplace dreaming up what tile to use and grout colour to go with. I started to research the process to retile, the cost associated with the prep work and finally the cost of the tile that we loved and realized that, A. there was no way I was getting into all of that anytime soon after just finishing so many other big renos, and B. holy, we don’t have the budget for all that.
Down the Pinterest rabbit hole I went with the thoughts of a budget-friendly DIY that would suit our century home. PAINT IT! It was clear as day. And for the most part, very simple.
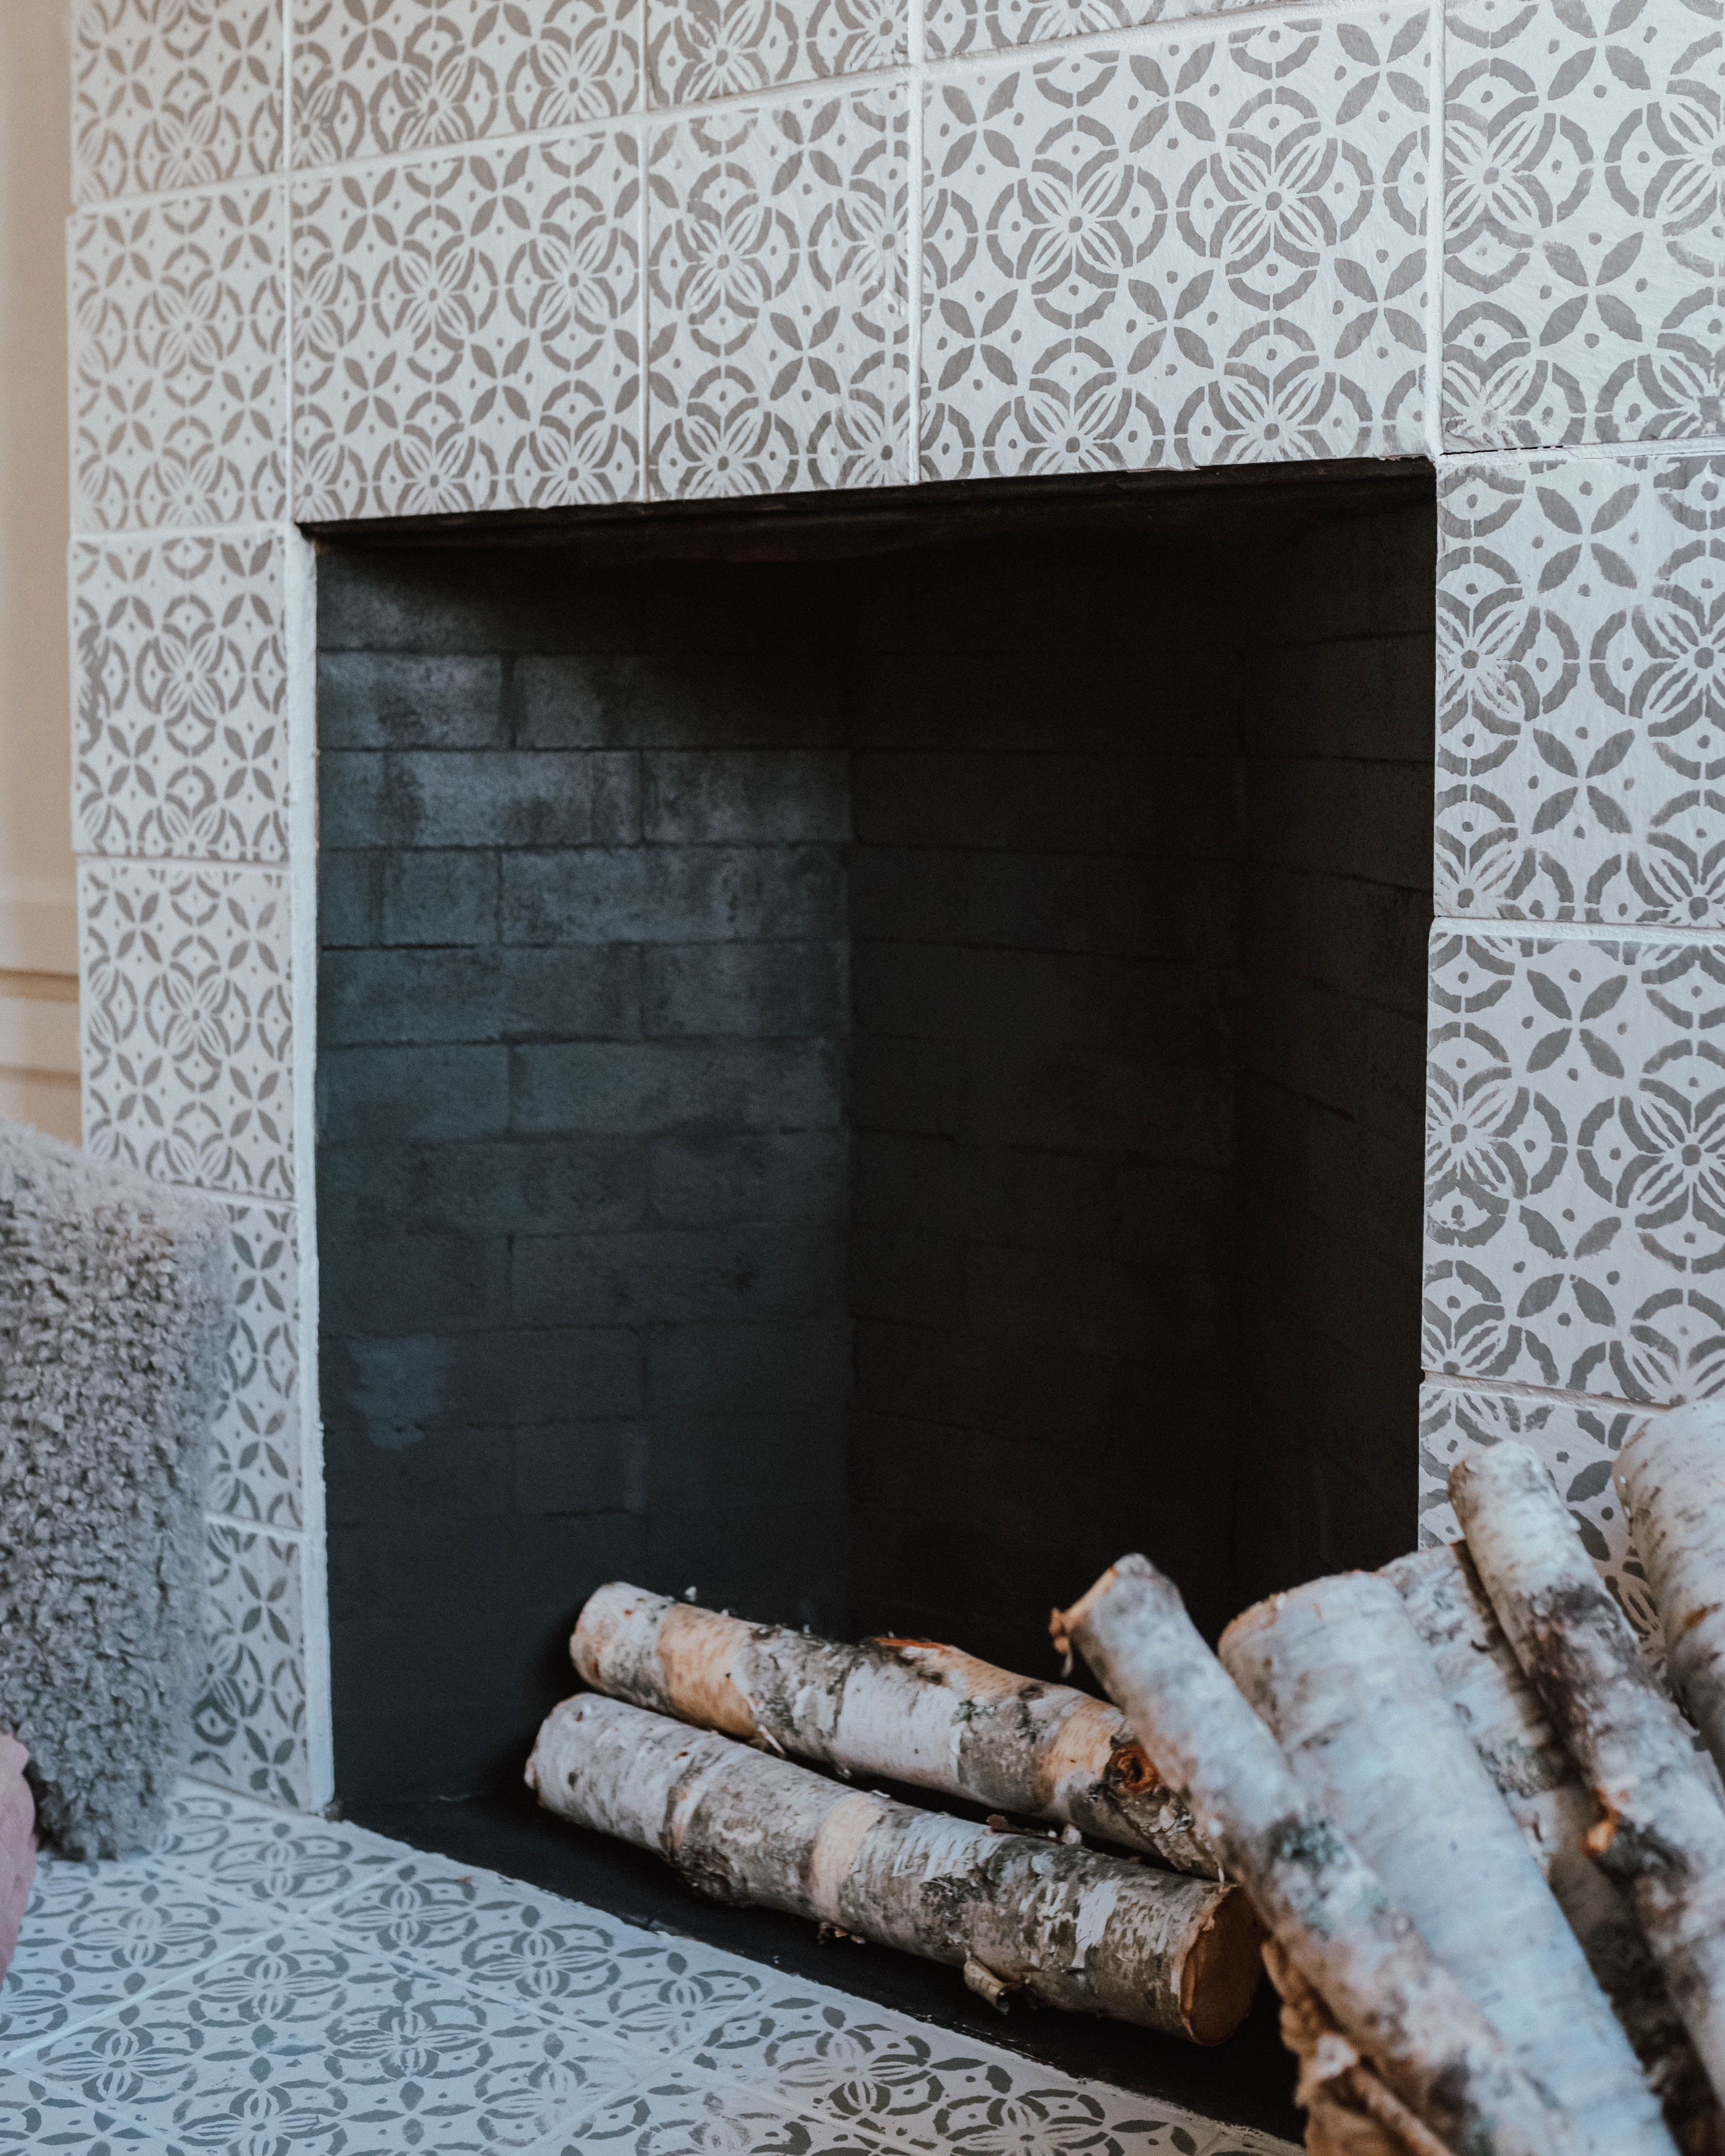
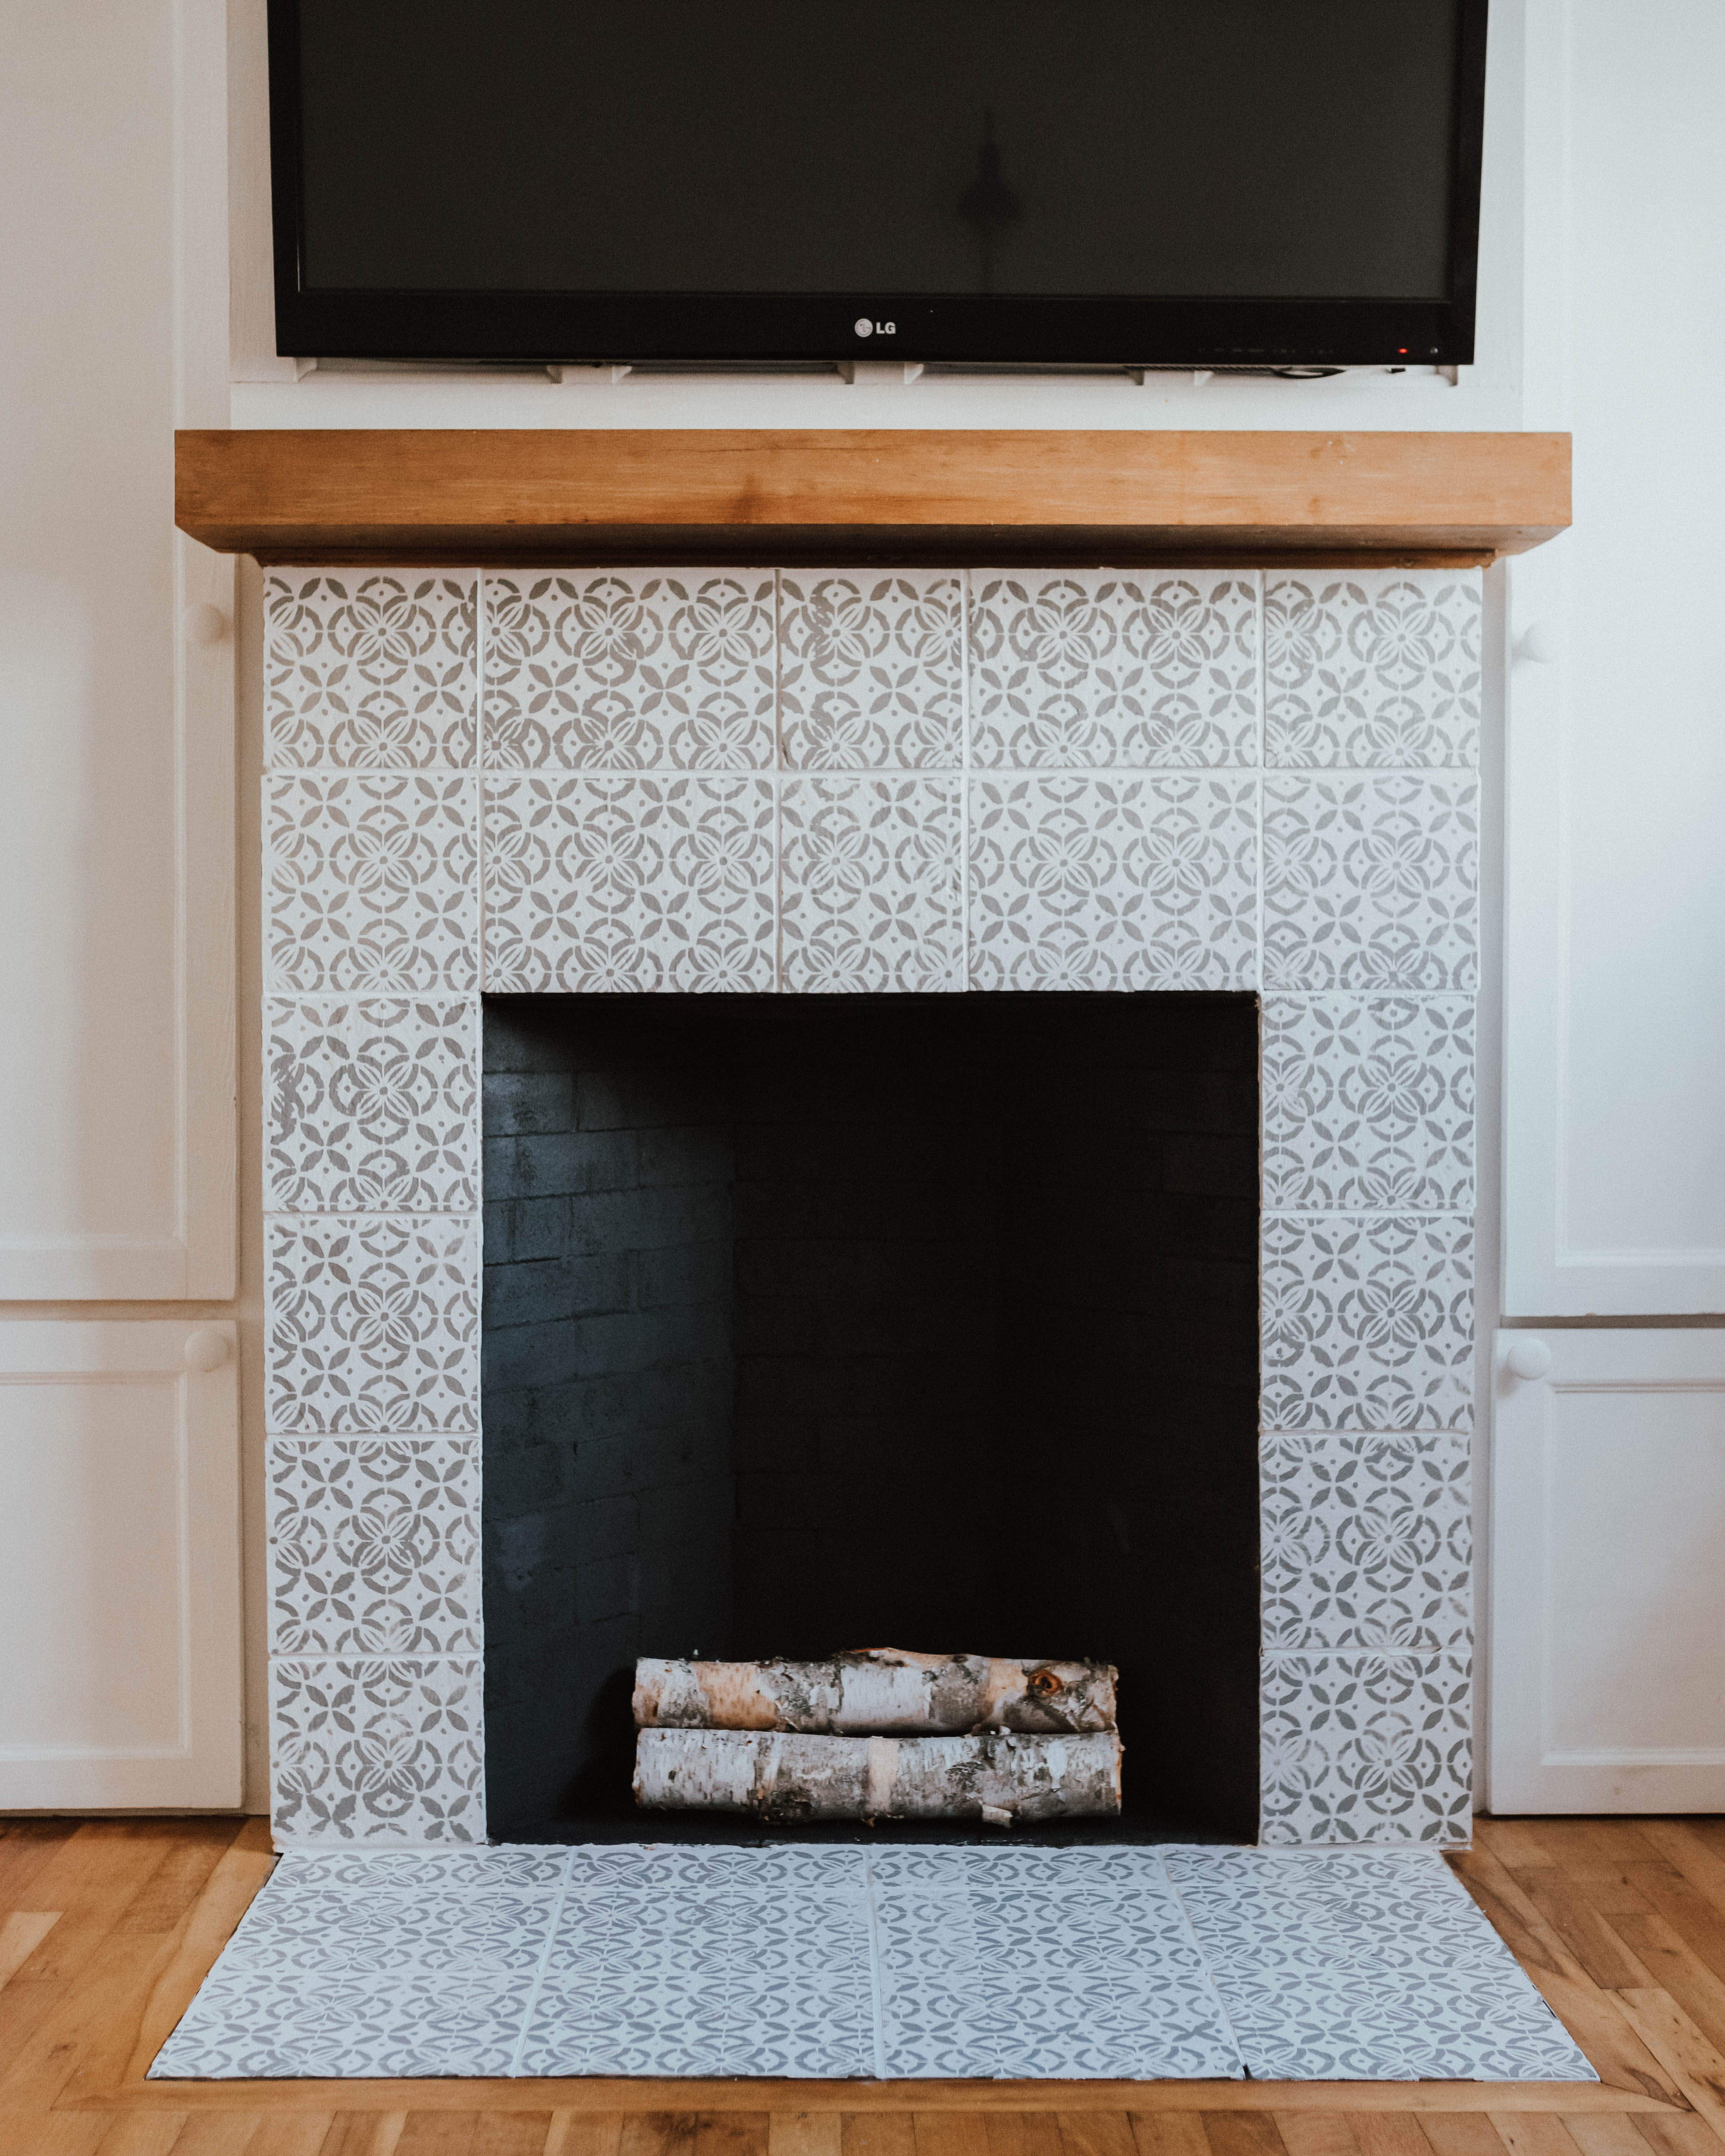
For $100 Canadian I was able to get everything I needed to take this fireplace from looking drab, tired and dirty, to bright and fresh looking. With the room being a darker space, it’s just what it needed.
My $100 Fireplace Makeover with Behr Paint
What You Need:
- 1 quart of lighter colour paint (We used BEHR MARQUEE Matte in Painter’s White PPU18-08)
- 1 quart of darker colour paint (We used BEHR MARQUEE Matte in Battleship Grey N360-4)
- 1 can of Behr Interior Chalk Decorative Paint (We used Classic Noir BCP45) or 1 quart of the same
- Stencil of choice (this is the one we used)
- Paint tray
- Painter’s tape
- Lint-free paint roller
- Foam paint roller
- Bucket
- Dish soap
- Scrubber
- Rags
To Prep:
Add dish soap to bucket of water and with your scrubber, start to scrub the entire surface that will be painted. This may take a while depending on how dirty it is. Our Fireplace had to be scrubbed three times over to get the soot build-up off. Once scrubbed, take rags and dry off all stone and bricks.
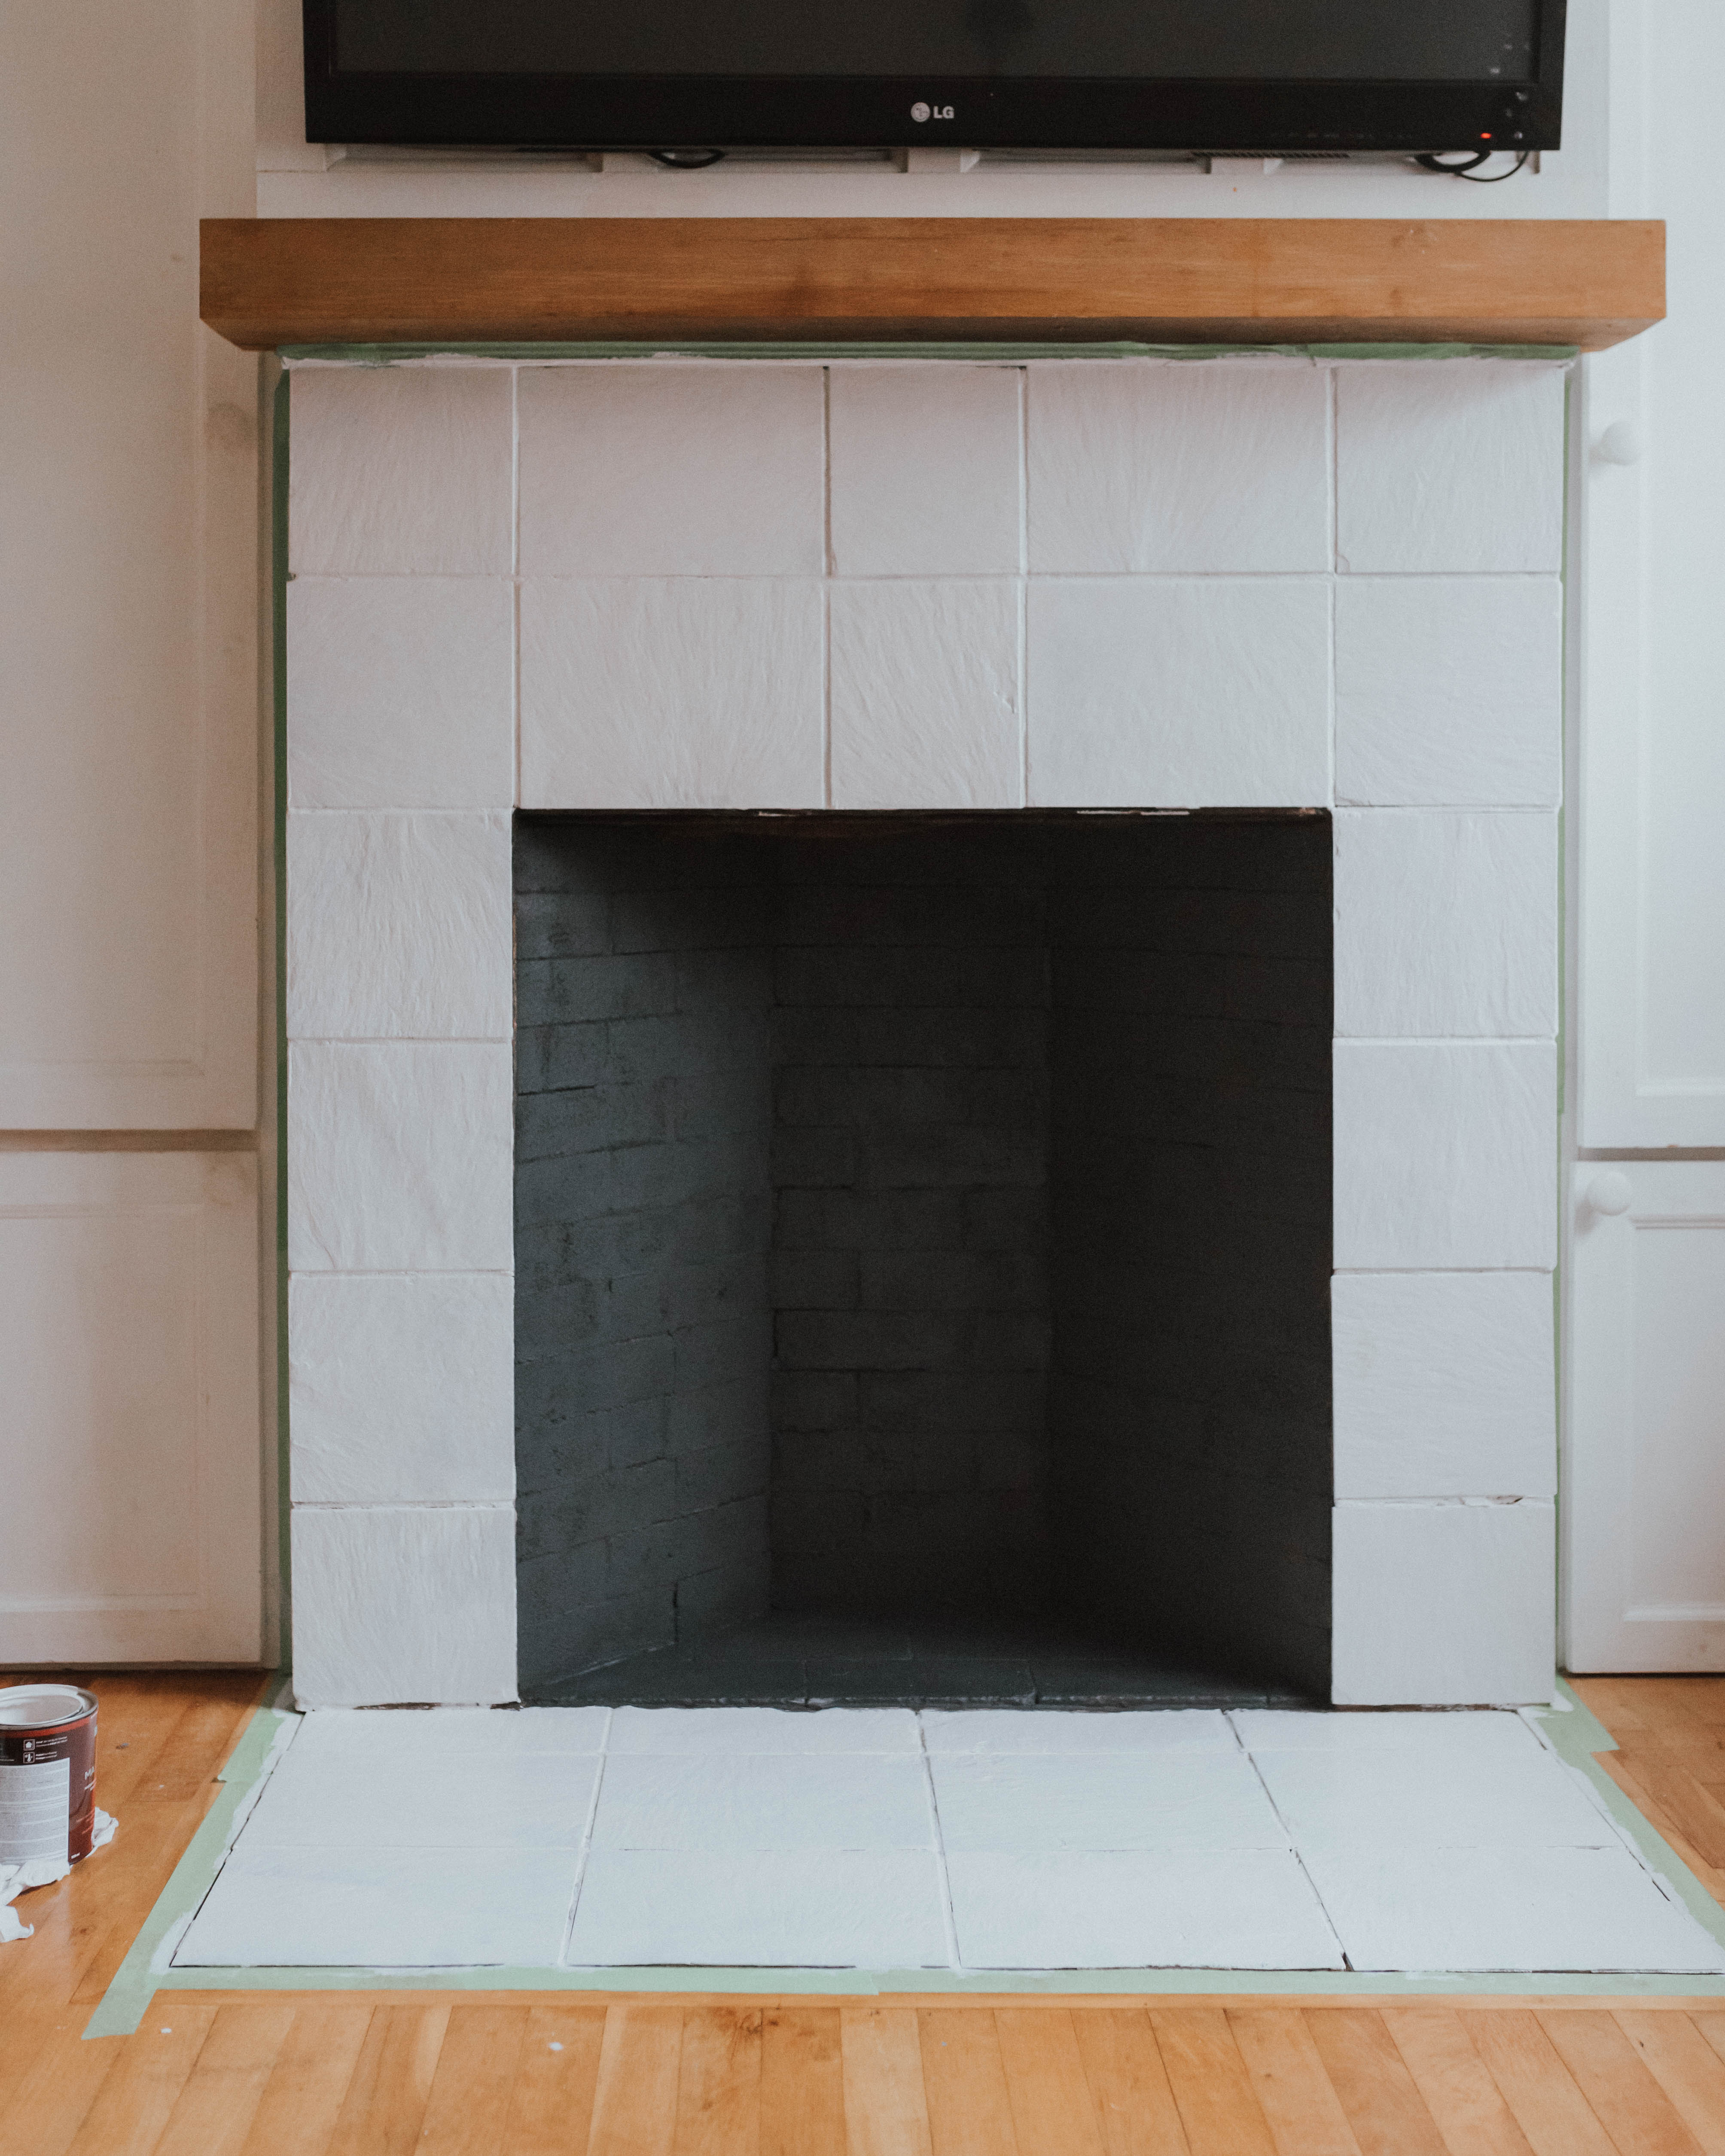
Once the stone is dry, start taping off the outer stone with painter’s tape to protect it from the black spray paint. Also tape off the edges and walls around the fireplace to protect them from paint.
Begin Painting:
Start by painting the inner brick of the fireplace with black paint. We used spray paint for this to ensure it got into all the nooks and crannies, but BEHR Interior Chalk Decorative Paint with a roller would work too. If you are using spray paint, make sure the room is well ventilated and you are using a mask. Do two coats of the black paint to ensure even coverage.
Once the black paint is dry, begin to paint the outer stone with your lint-free roller. We went with a BEHR 2020 Colour Trends Palette pick—Painter’s White—for this as we wanted to keep the room very airy and bright. We did three coats because we wanted to make sure that it would hold up on the stone hearth and look crispy white. BEHR MARQUEE Paint is great as it has full coverage with the first coat and it also only has a two-hour wait time in between coats. I did all three coats and then let it cure overnight before using the stencil.
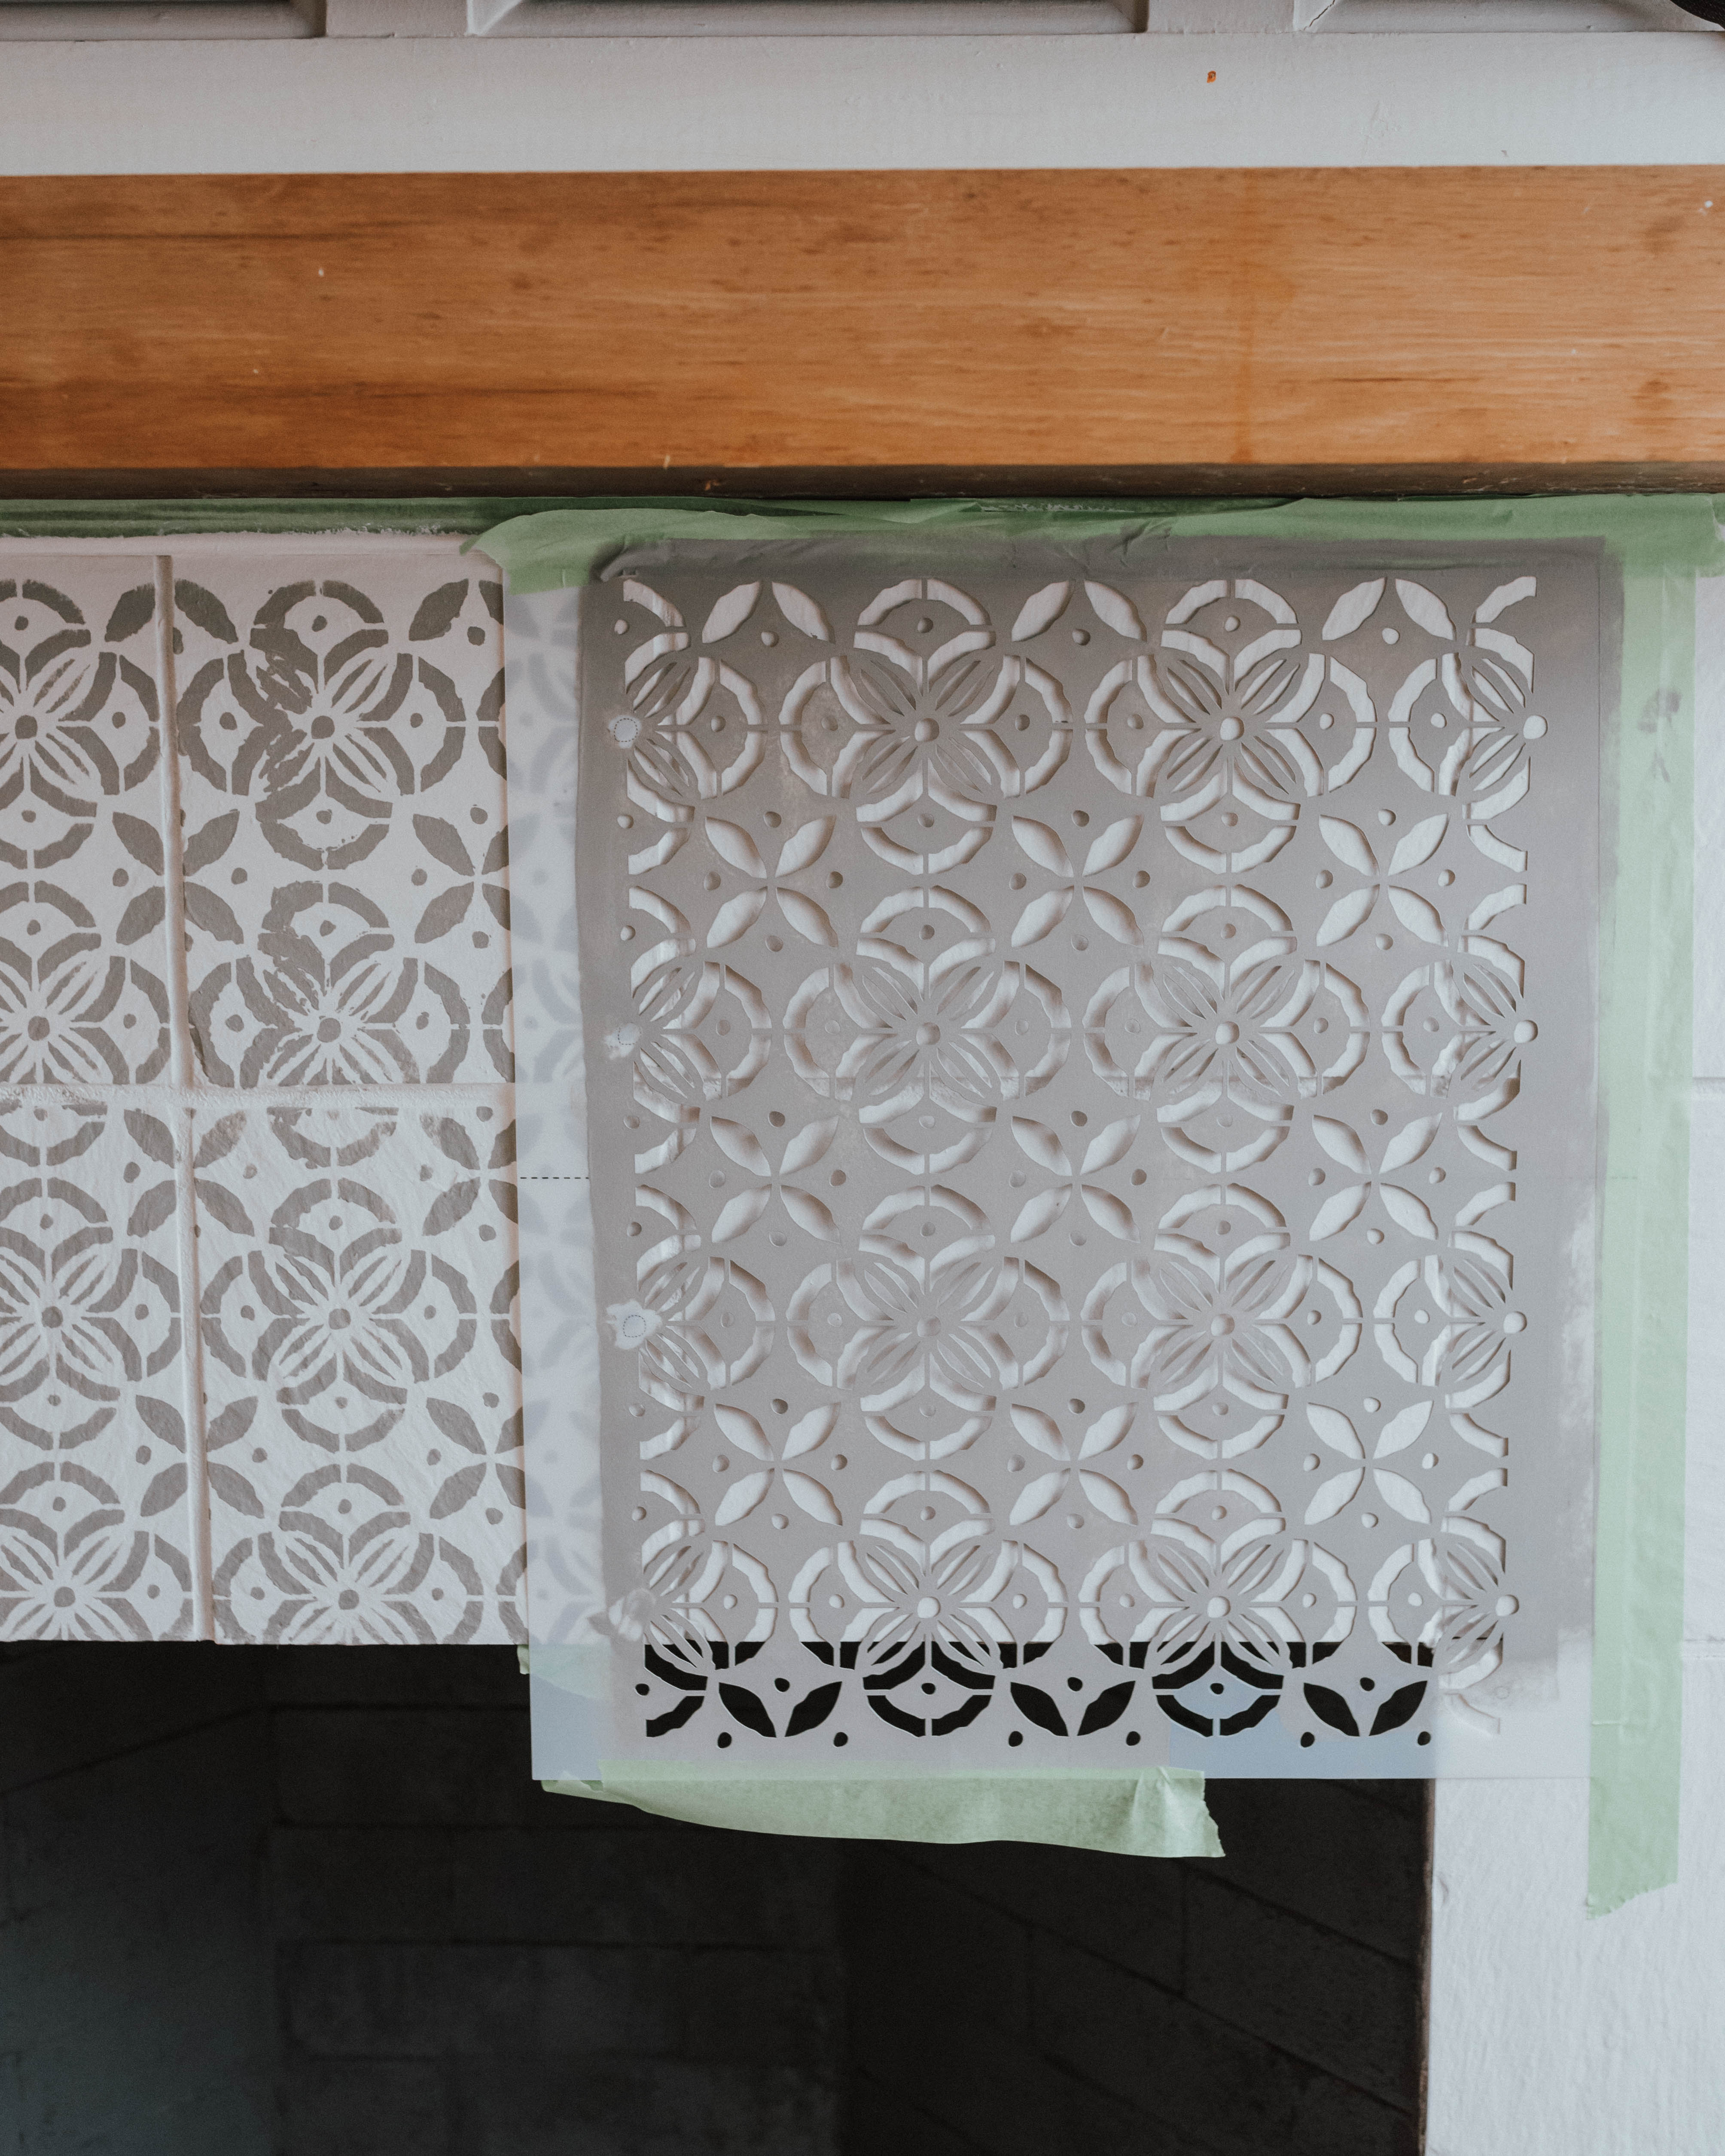
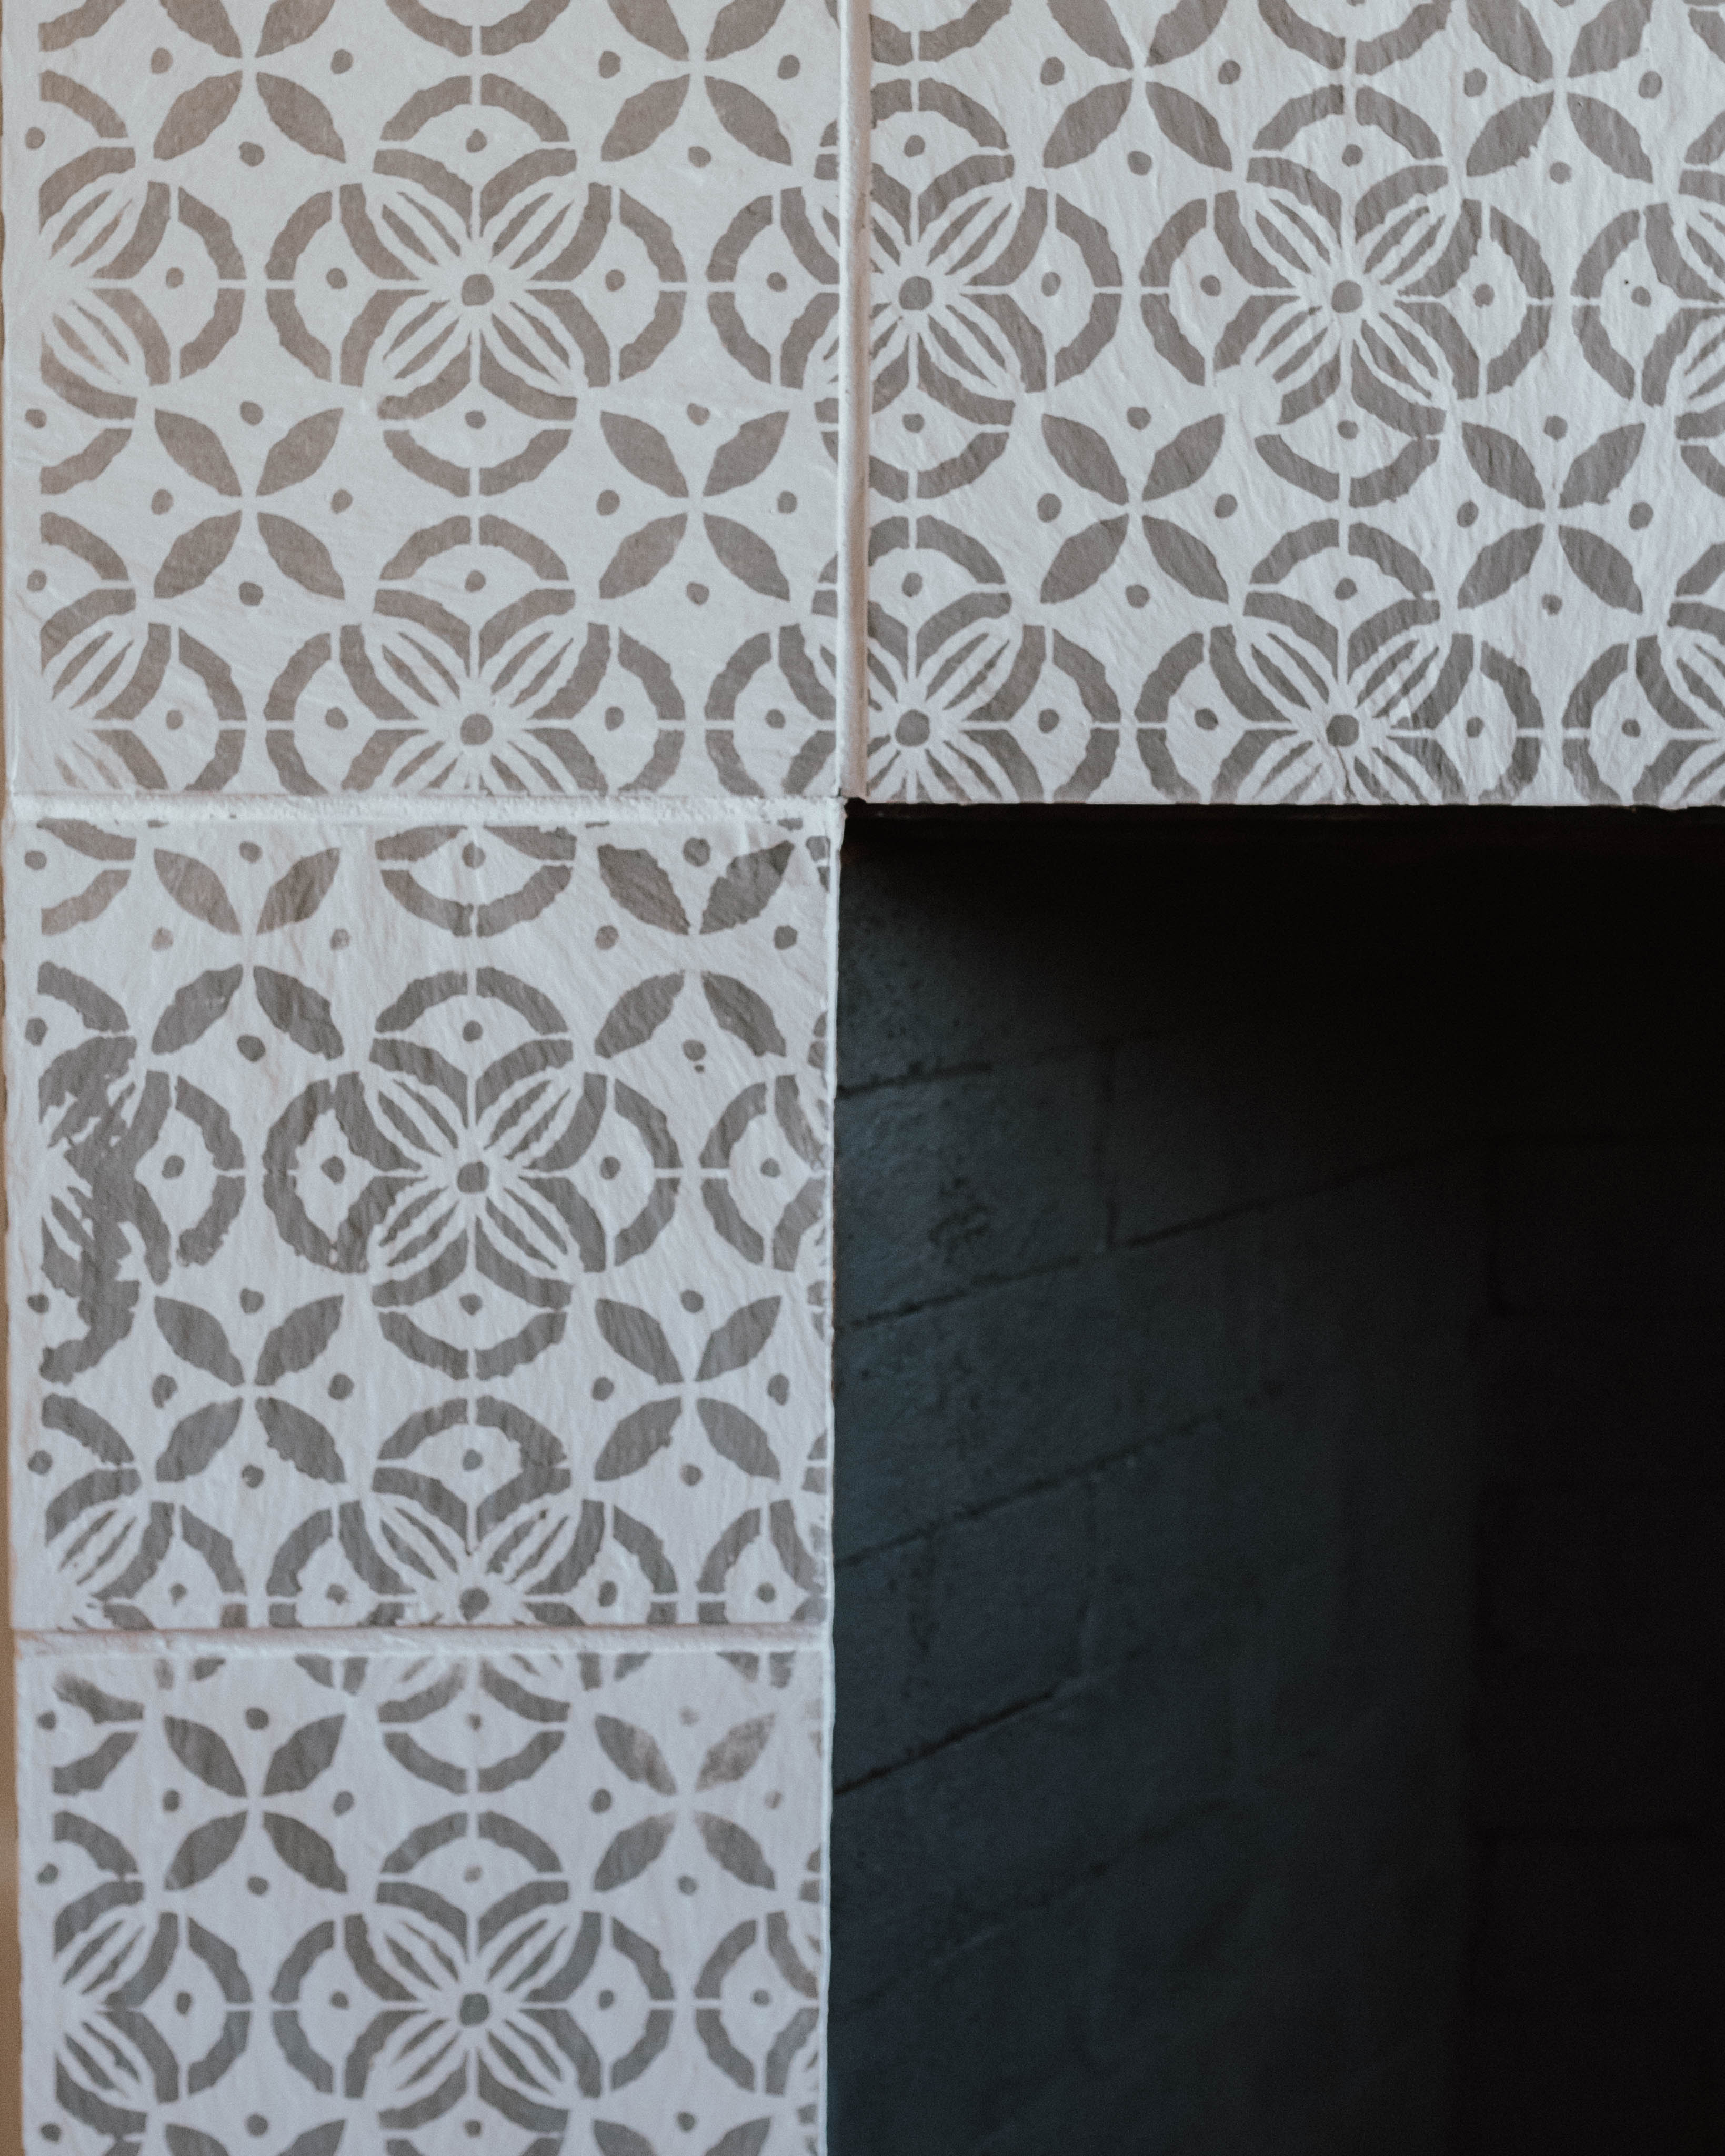
On day two, it’s time to paint your stencil. If you were doing a smaller space, you could also purchase a sample size of the paint for this portion as we didn’t use much from our quart. Using the painter’s tape, find out how you want to place your stencil across your stone, then tape it in place to begin. Use the foam roller to paint to stencil, making sure you don’t have a ton of paint on the roller, begin to roll over the stencil lightly. Slowly remove the stencil and let paint dry a few minutes before matching it up to continue painting. Most stencils will have design dots to match up when you move the stencil over so you can make sure everything is evenly spaced. Continue painting until all of the fireplace has been stenciled.
Curing Time:
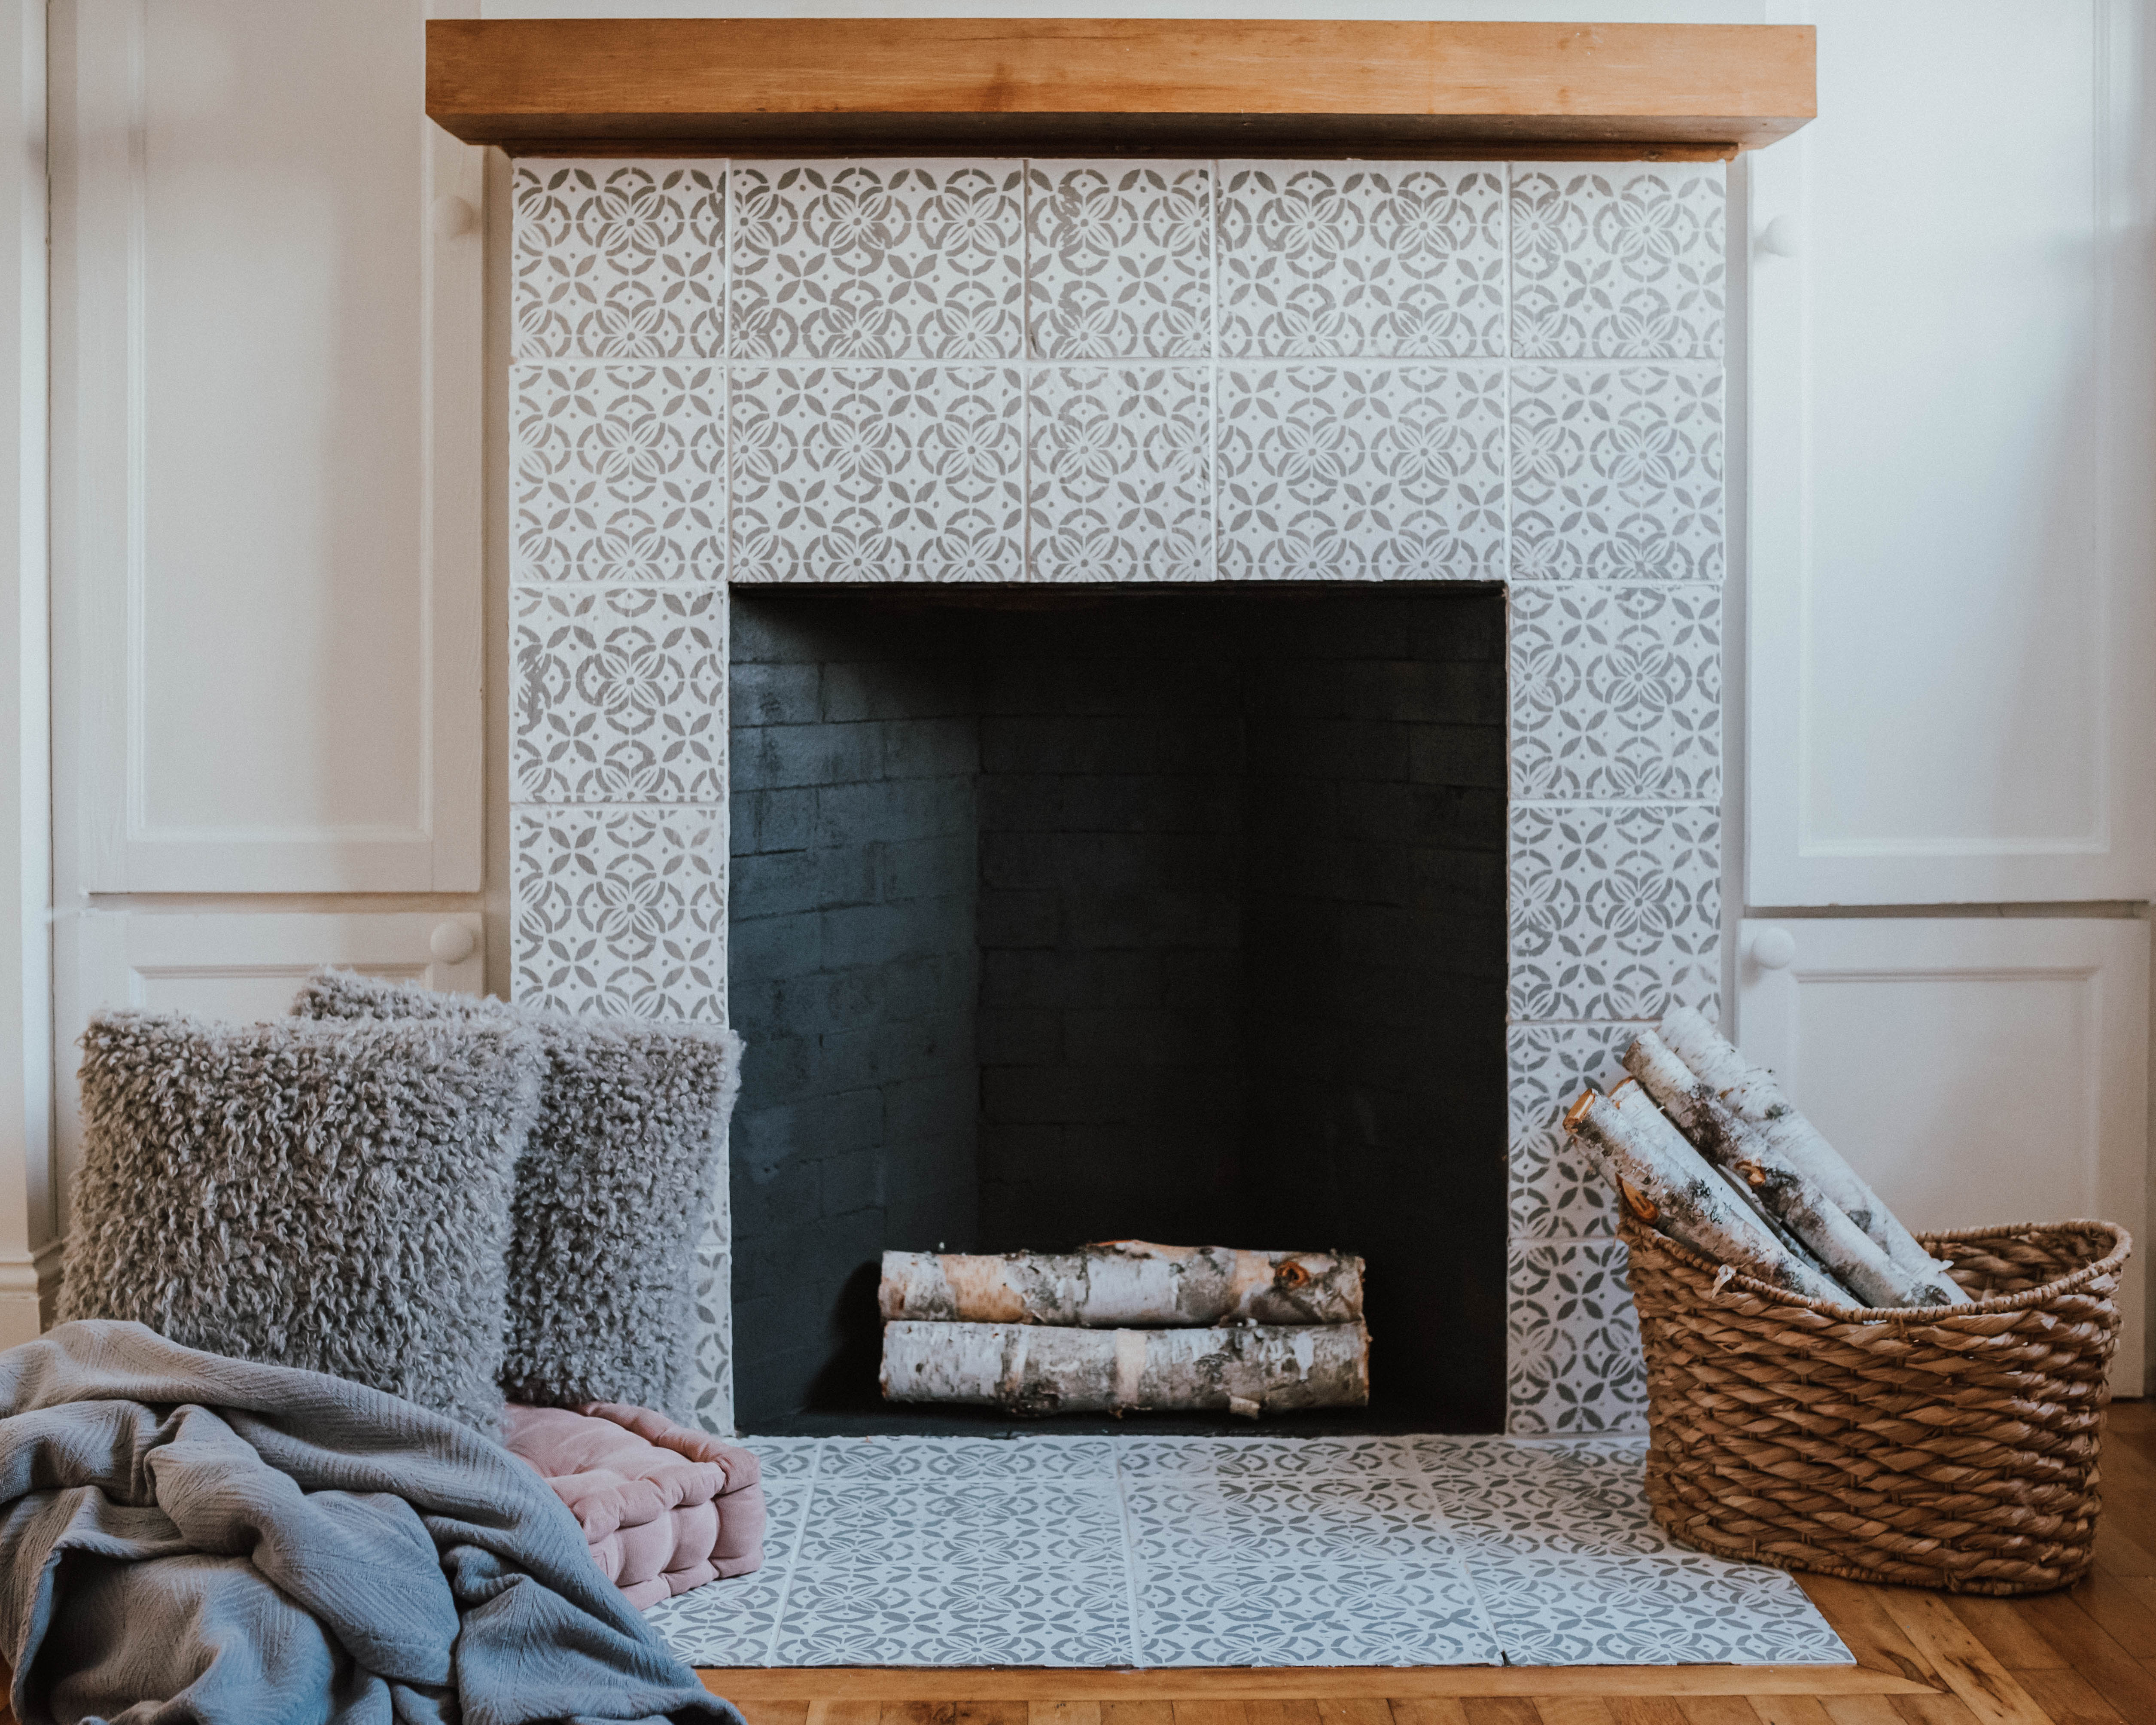
Your fireplace is now done and looks stunning. But, I can’t stress enough that it takes 30 days for paint to fully cure and adhere so be easy on your fireplace for the next month and enjoy the work you just did.

I am excited about this idea, we just moved into a new home and there is a propane fireplace, the tile is dated and I was thinking about ship lapping the wall but now I think that this will be a much better option!
Yes, just make sure you use heat safe paint for yours. our fireplace is no longer used so we didn’t need to.
Could it be that you have a Rumford fireplace? They are shallow with deeply angled sides. Supposed to work really well. There is or used to be a man in Chester who built them. I know someone who had one built. Brenda Mulroony who still lives in the village. Fireplace looks great.!