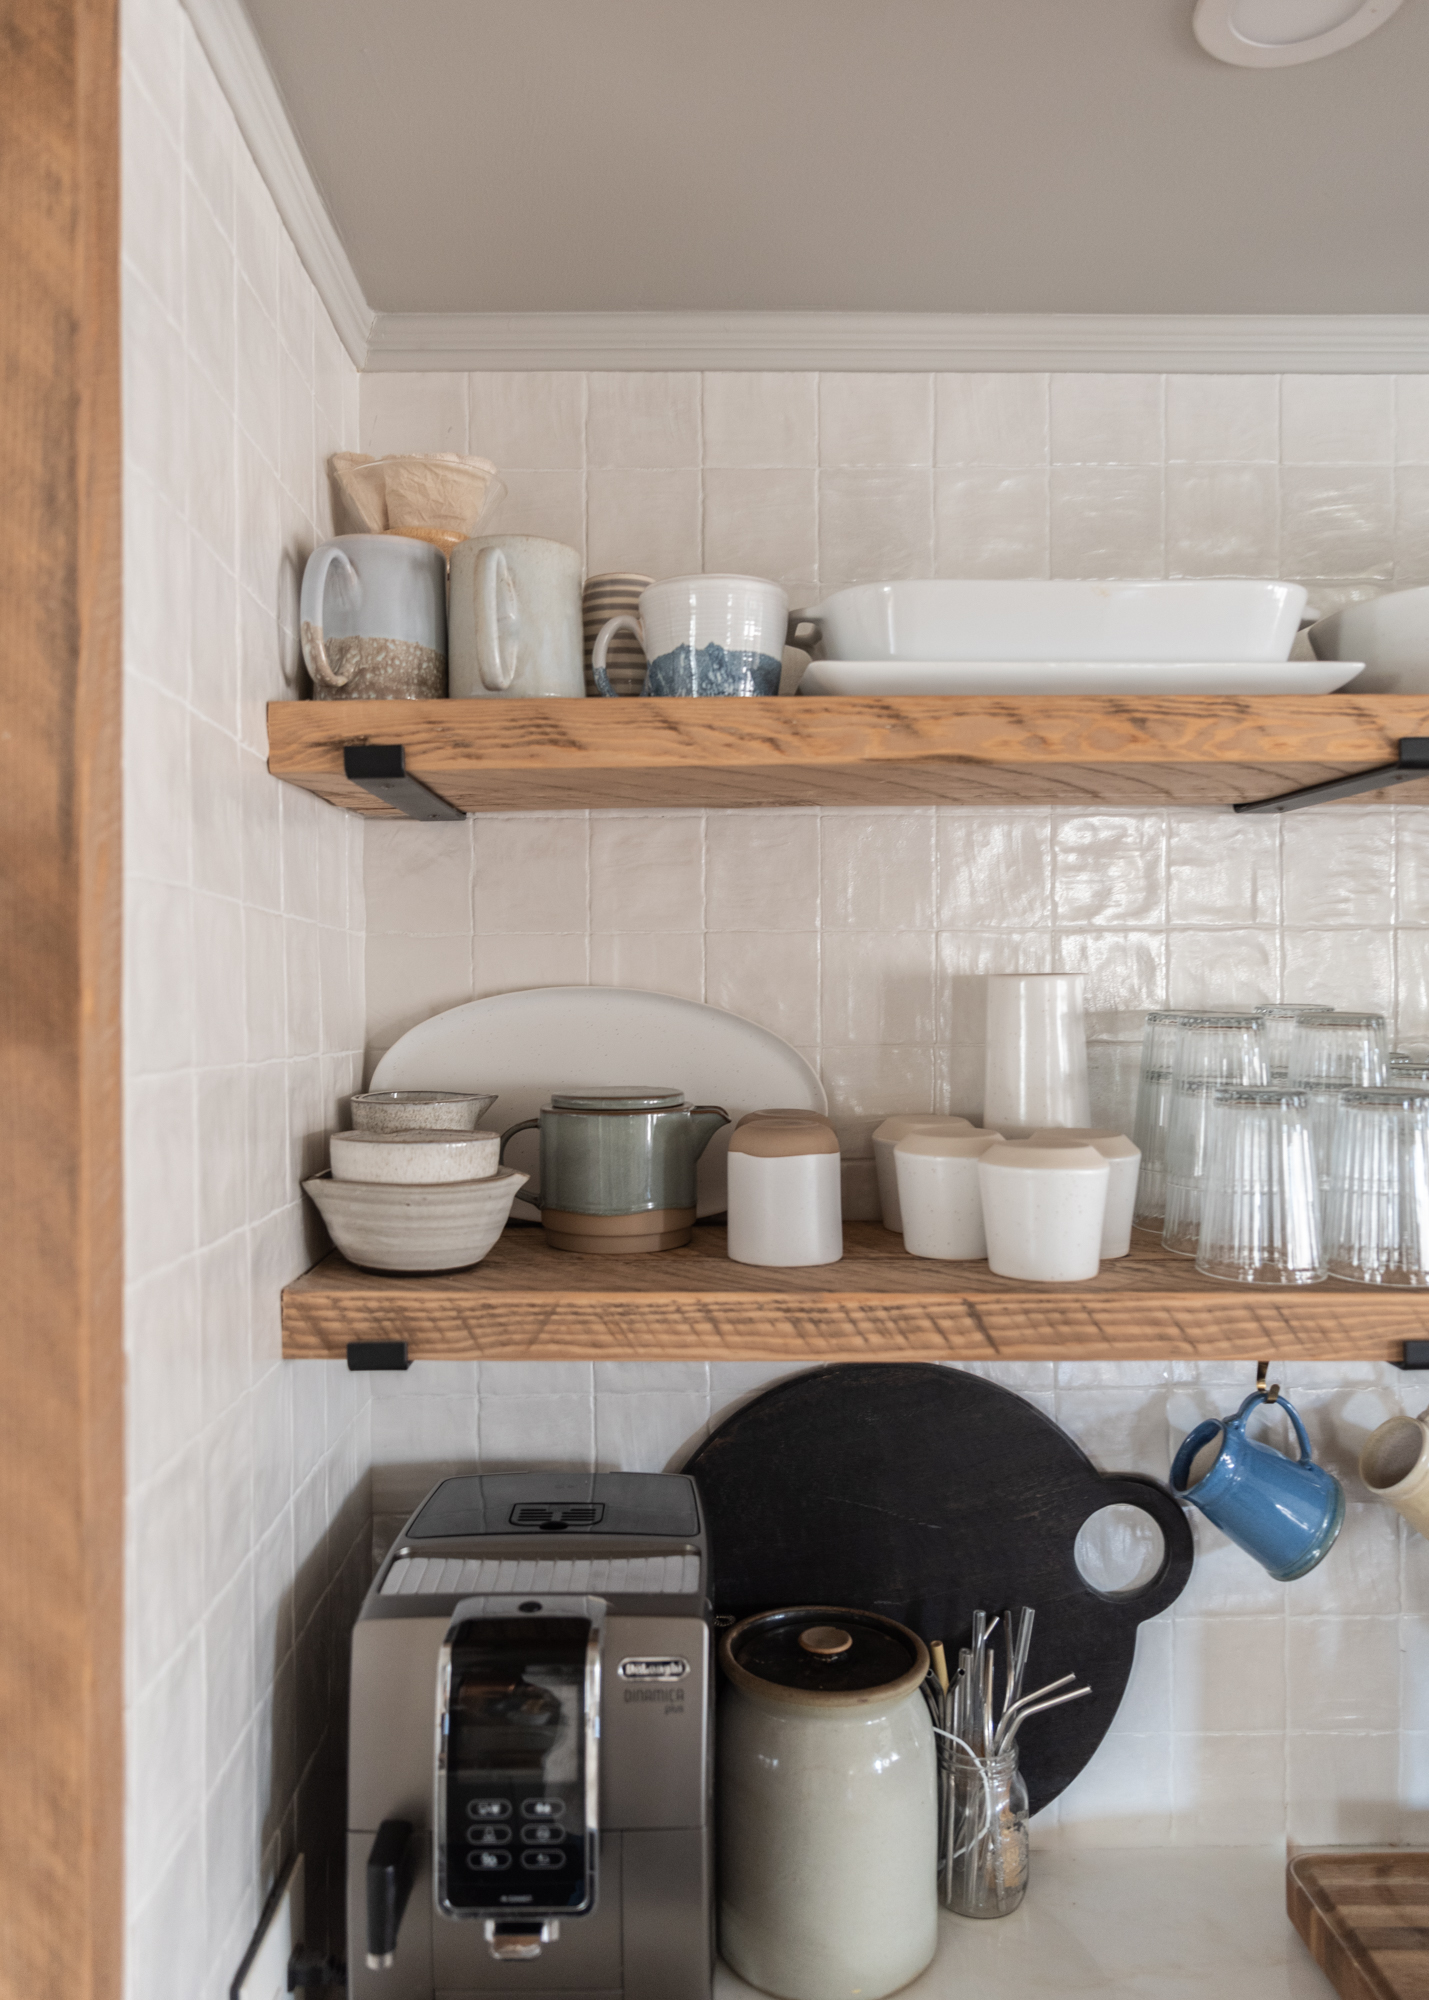
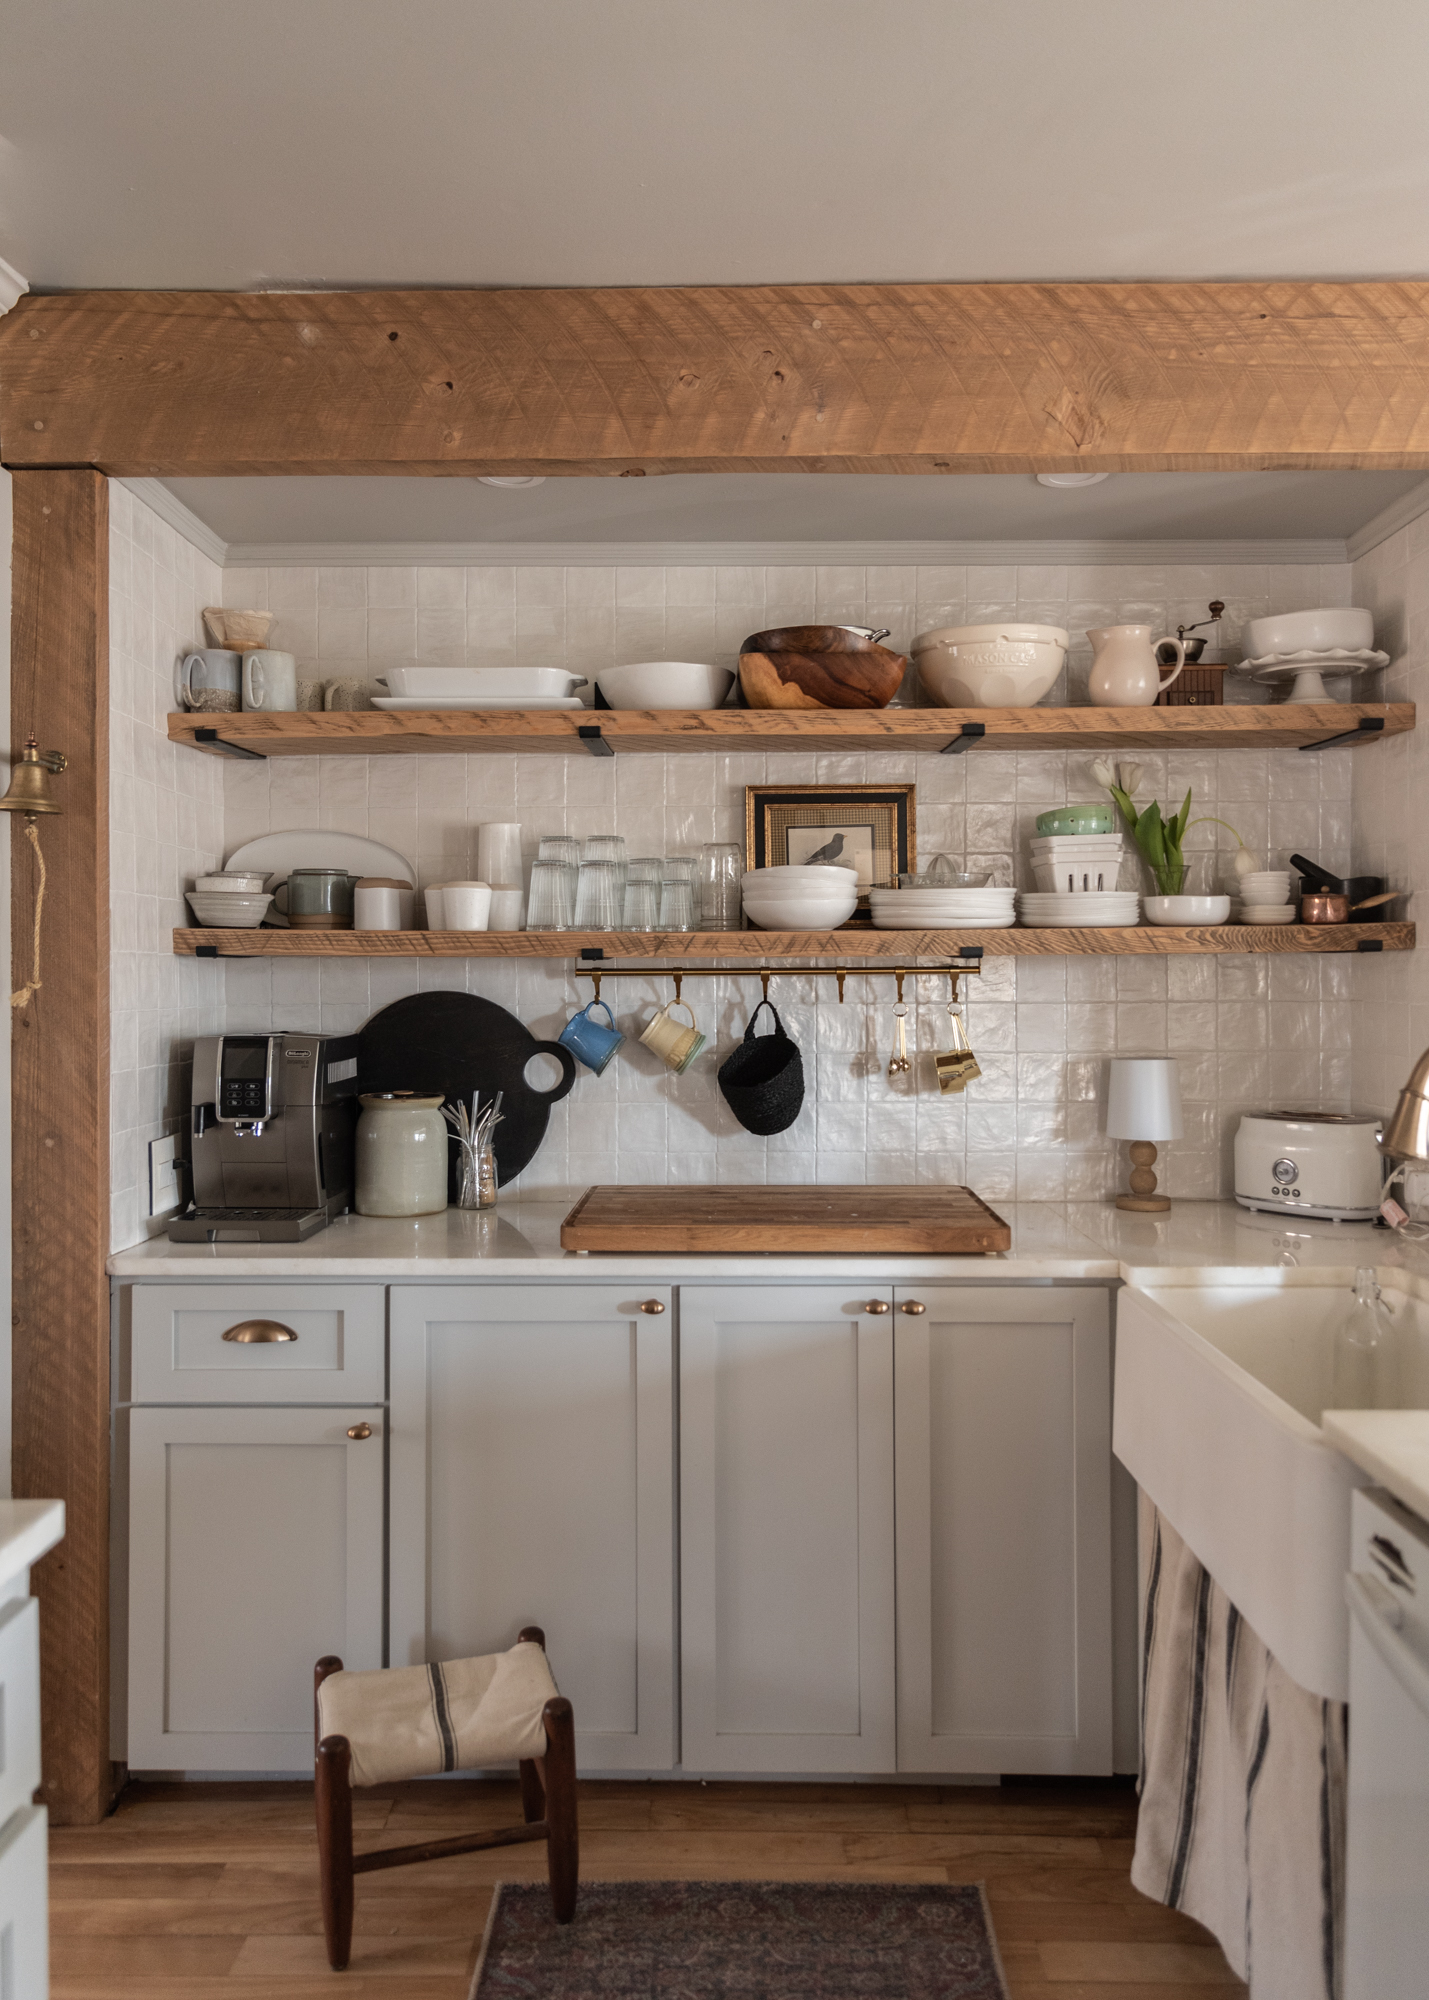
Tips For Open Shelving in a small Kitchen
It has been a year since we took down our glass door uppers (THEY WERE THE WORST) and finally traded them in for open shelving. Over that year, every time I shared them I am flooded with questions as to how to make them work in a small kitchen with not much storage, and how many of you couldnt deal with the dusting. Im over here like what dust? If you think dusting is horrible come look under my bed! hahah.
In all seriousness, there really isnt much dust at all but i think thats because we planned theses shelves out for 3 years before finally exicuting them so we know what would work best for such a small space. Today over on Instagram, I shared tips for making open shelving work for your home, so I thought maybe it would be beneficial to tackle that question over here too.
The biggest lesson first is to only keep kitchen stuff you actually use. You know what I mean. Those kitchen gadgets you got from your aunt for Christmas that hang out in a cupboard taking up space and not once have you ever used it. Or the fact that you have six different pie plates but really only use one. This is a hard lesson we had to take living in a smaller house but also when we wanted open shelving. Purge Purge Purge. GET RID OF IT. Anything that we didn’t use at least once a month, we either gifted to family or donated. Those things we needed every once or twice a year we added storage in our basement for or will rely on family and friends to borrow. This helped so much in minimizing the kitchen ‘stuff’.
The next thing that we did to make this successful for our family was to start investing in kitchen items we used to on a daily basis that also brought us joy when we looked at them. We traded in the chipped unmatching IKEA plates, the old hand-me-down drinking glasses, the mix-and-match tacky phrased coffee mugs etc. for beautiful pieces in sets that brought both our hearts and our eyes joy. These are the items that go on your shelves.
Perfect, you now have this beautiful collection of items that you use on a daily basis. That brings us to the next rule of thumb for outfitting your shelving. Only use the shelving to house items that you touch or use at least once a day. This means you’re serving ware, mixing bowls, and tableware. the reasoning behind this is that so many people are worried about dust. If you are using the item dailing it has no time to collect dust, even in an old dusty house like ours. It also adds ease to your day. Supper time is easy when you can just grab your pretty white collander off the shelving instead of digging for it in a cupboard. Or, like my 9 year being able to easily reach a glass cup for his apple juice. Having everything we need a second away from our fingers without having to take the time to open search for and close a cupboard is worth it all.
Use Styled Pieces but minimally. and those pieces you do use, should be smaller and have history or bring immence joy. Doe me, its the coffee grinder my Grandmother used for years and years. Art is also a great way to add dimension to your shelves. Place the art on the low lying areas and secure with command strips picture hangers so that even if the item infront of it is moved, it stays in place.
Add life to your shelving. Our kitchen is dark so I do this with cut flowers or even herbs. But, if you have natural light, you could even add potted herbs to the shelves. that would make it still functional and pretty.
Thats pretty much it. THe rules we have created for our own shelves that have had it work for the last year and will continue to work for us for years to come.

Links:
All our tableware is Fable. Use code “THEWILDDECOELIS10OFF”
Baking dish is Staub
Cups: IKEA
Wood Bowls: Homesense
Mason Mixing Bowl: Chapters
Cabinetry colors: This Blog